

Manual Roles Management for Okta SSO Provisioning
Manual Roles management for SSO Provisioning
To create the custom field, the following steps have to be performed
- Go to Directory>Profile Editor and select the connected with Consensus Application
-

Directory>Profile Editor and select the connected with Consensus Application - Once the Profile Editor is opened, click 'Add Attribute' button
-

'Add Attribute' button - On the opened form we need to provide the following information
-
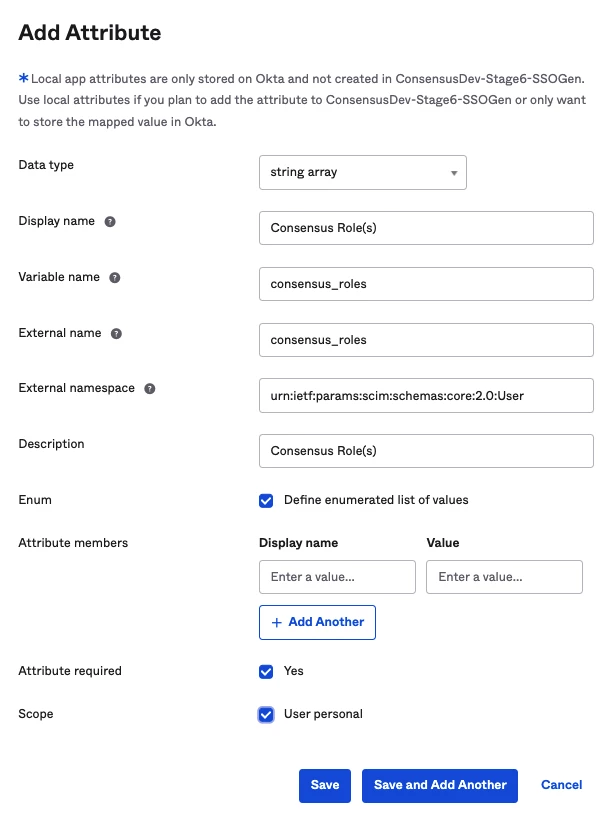
Required Information
| Field | Value | Notes |
| Data type | ‘string array’ | |
| Display name | Any convenient for you name | |
| Variable name | ‘consensus_roles’ | |
| External name | ‘consensus_roles’ | |
| External namespace | ‘urn:ietf:params:scim:schemas:core:2.0:User’ | |
| Description | Any convenient for you description (optional) | |
| Enum | has to be checked | |
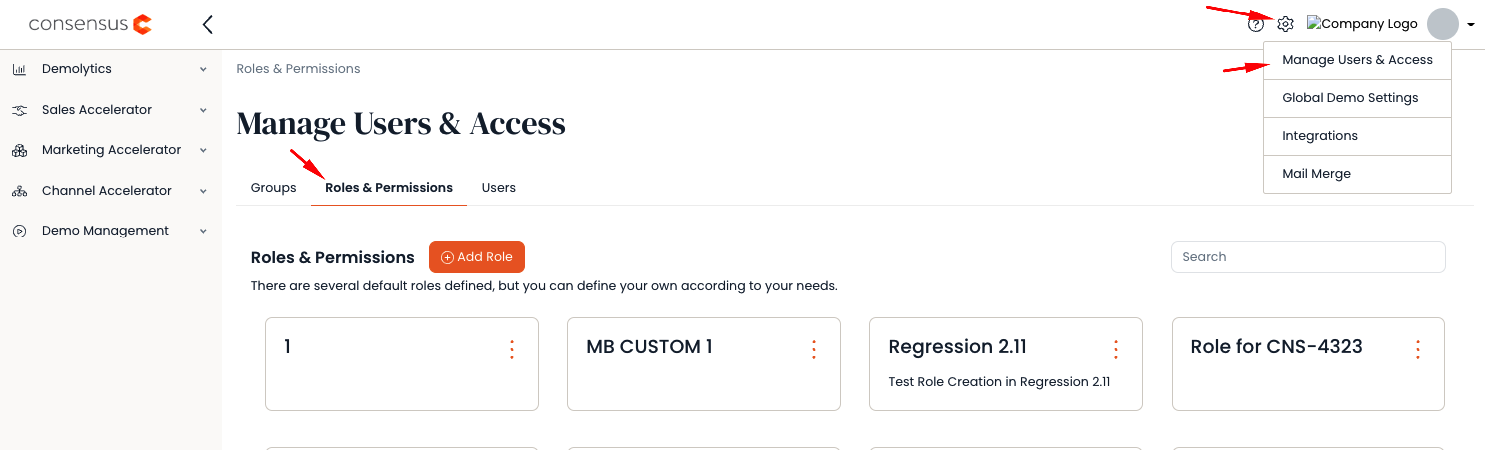
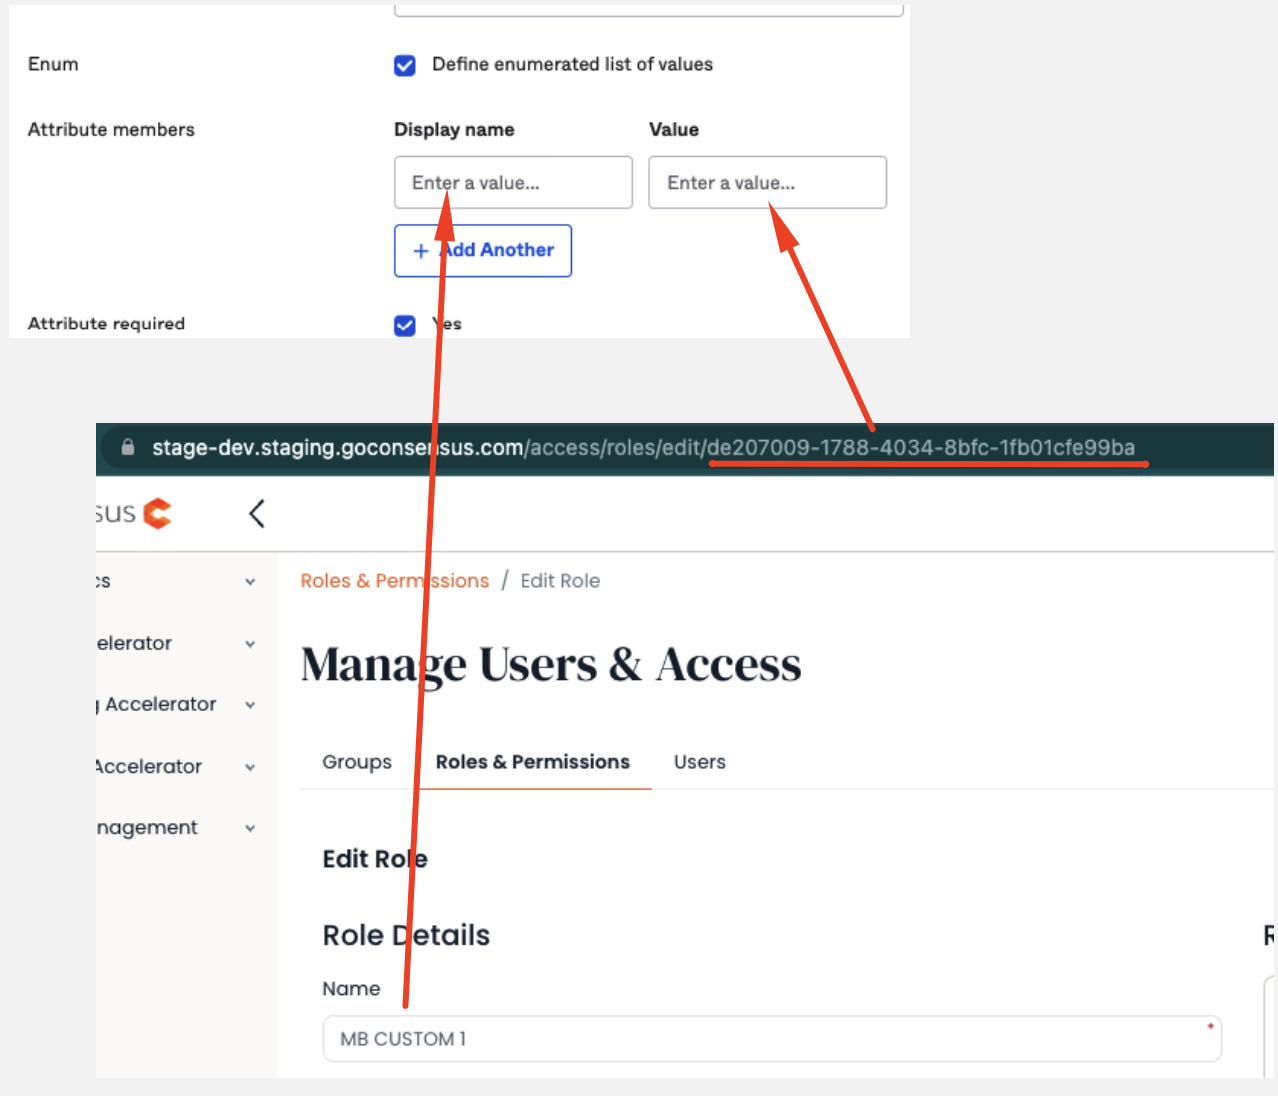
| Attribute members | The list of Roles within your Account should be provided with their ids | The list of System Roles (Display name - Value): Admin - 443ff3eb-b550-4526-9d7e-9bf96ffd1a37 If you have custom Role: 1. Go to app.goconsensus.com>Manage Users&Access>Roles&Permissions tab
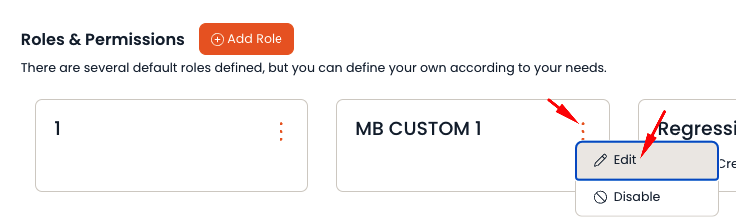
2. Find the needed custom Role, click on three dots and click 'Edit'
3. After the Edit page is opened
4. Repeat it for all needed custom Roles |
| Attribute required | has to be checked | |
| Scope | has to be checked |
- Save the form
Further Custom field managing for Consensus Roles
If there is any update within the Roles on Consensus side - these updates should be transfered to Okta as well. To do it, go to the same place in Okta, find the needed custom field and click 'Edit'. The new Roles might be added or existing might be edited/deleted.
