
Creating a connected app for Secure API communication in Consensus SFDC integration - Updated for V11
Step: 1 Create a connected app.
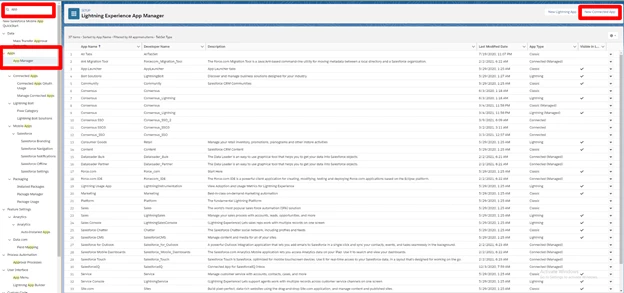
- From Setup, enter App in the Quick Find box, and select App Manager.
- Click New Connected App.
Create a connected app. - In the Basic Information section enter required fields, you can name the new app Consensus.
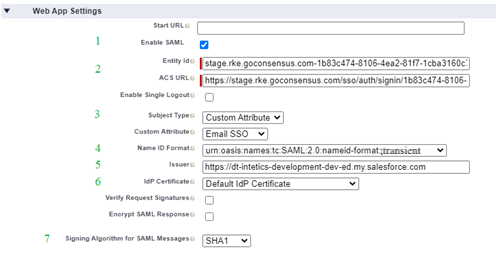
- In the Web App Settings section:
1) In the field: “Enable SAML” mark checkbox.
2) In fields: Entity Id and ACS URL enter values obtained from Consensus.
2.1) To gather Entity ID go to Consensus-->Settings-->Integrations-->SSO and get value from the field shown below.
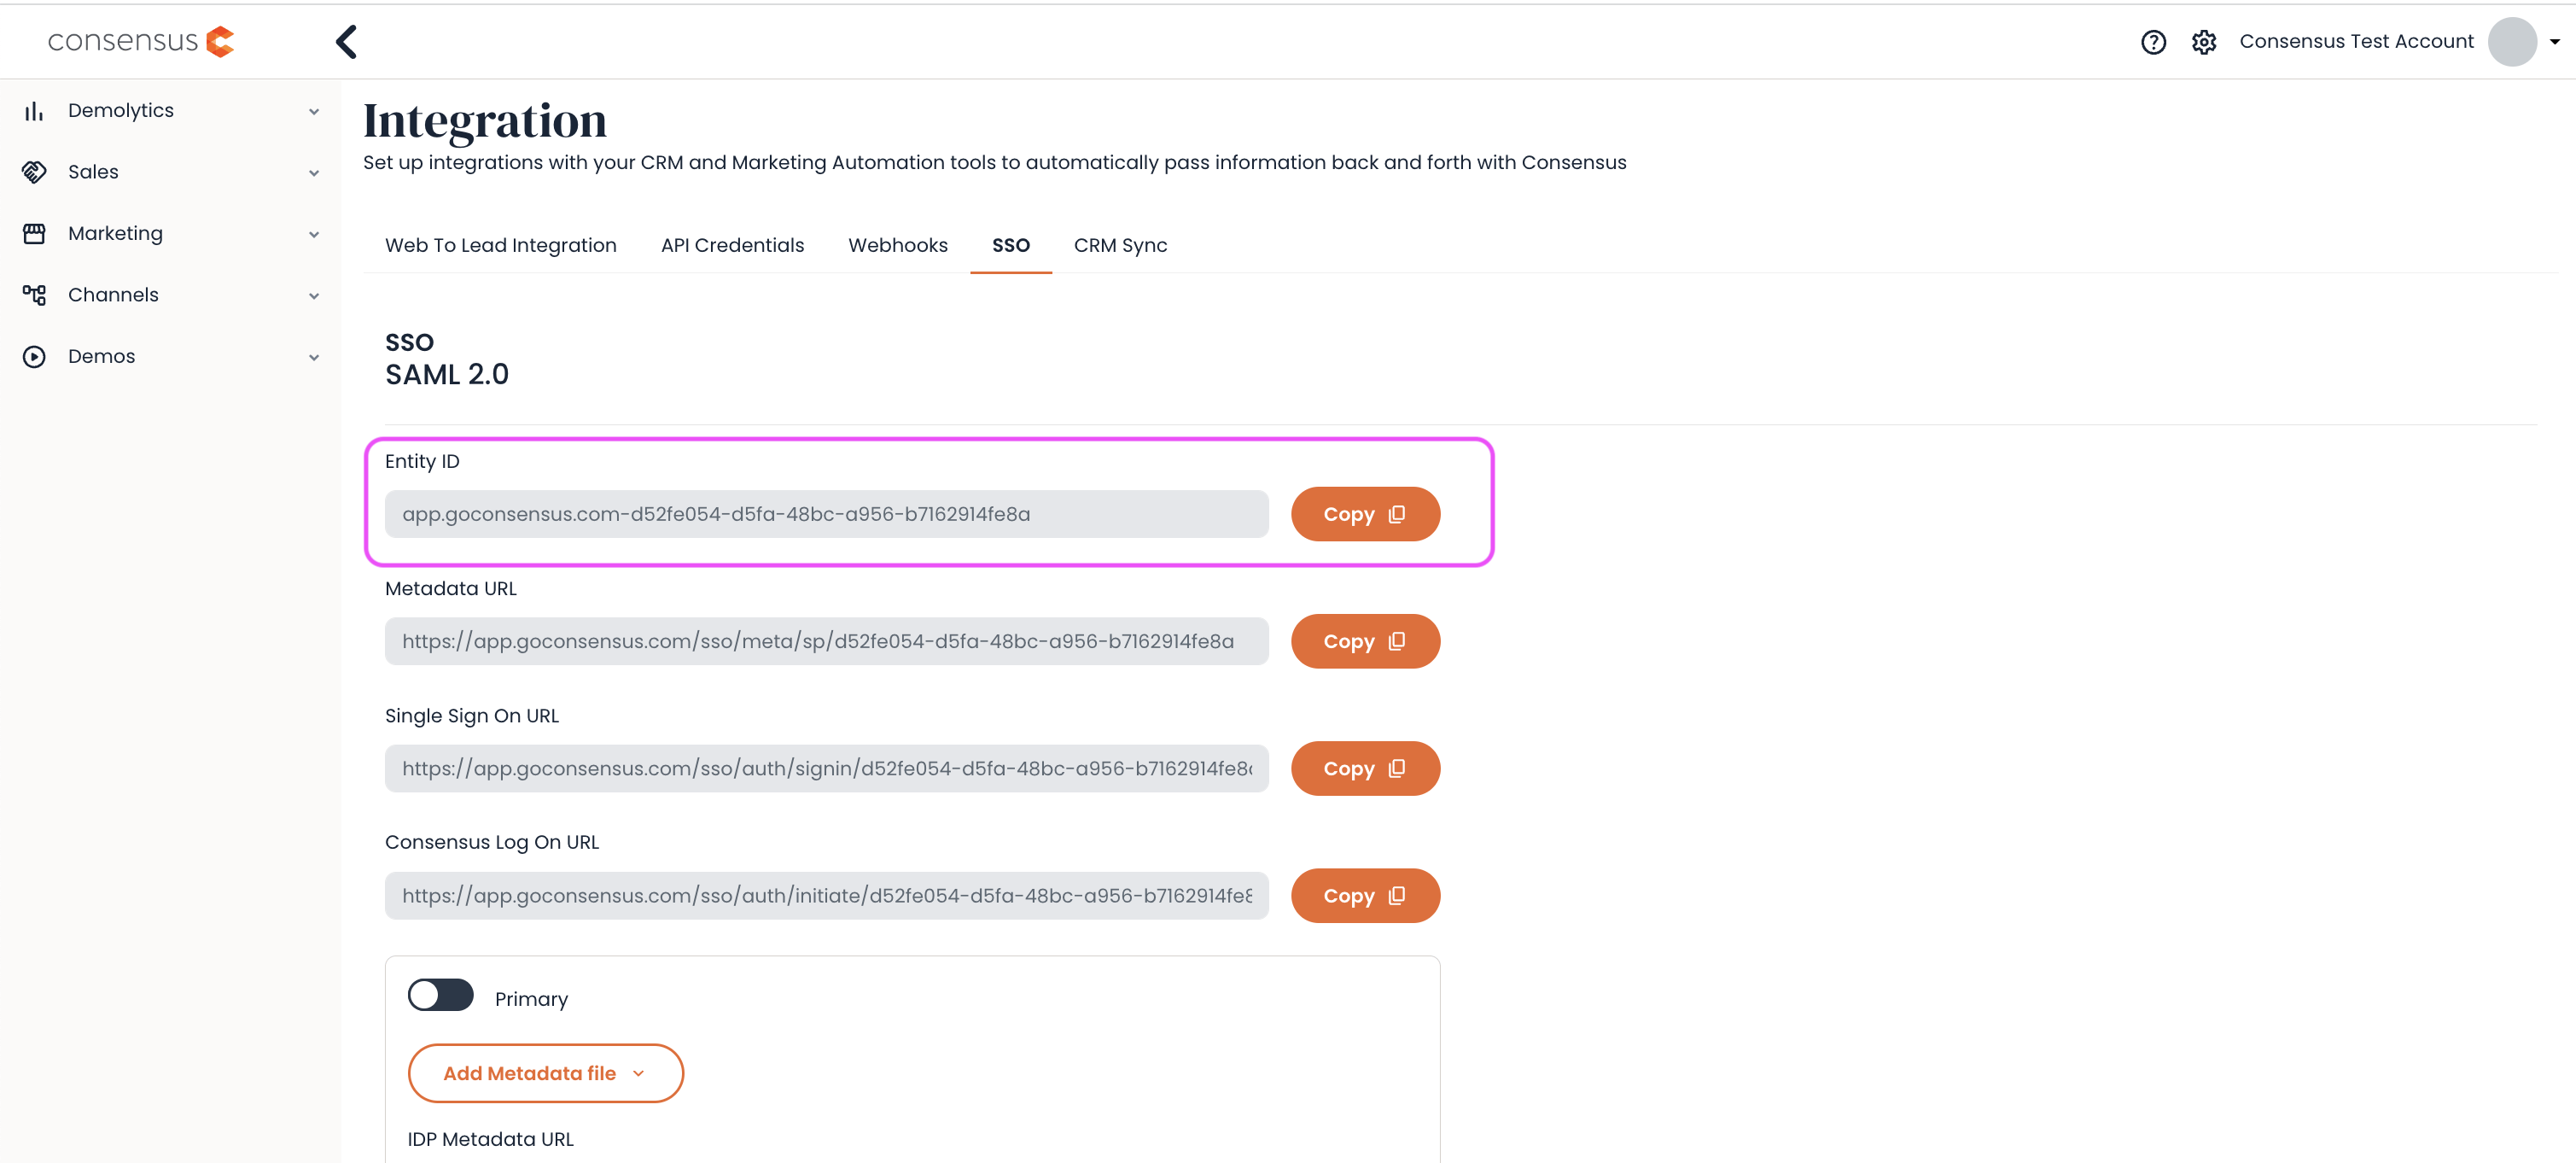
Integration tab
2.2) To get ACS URL, copy the Single Sign on URL and paste that into the ACS URL field in Salesforce.
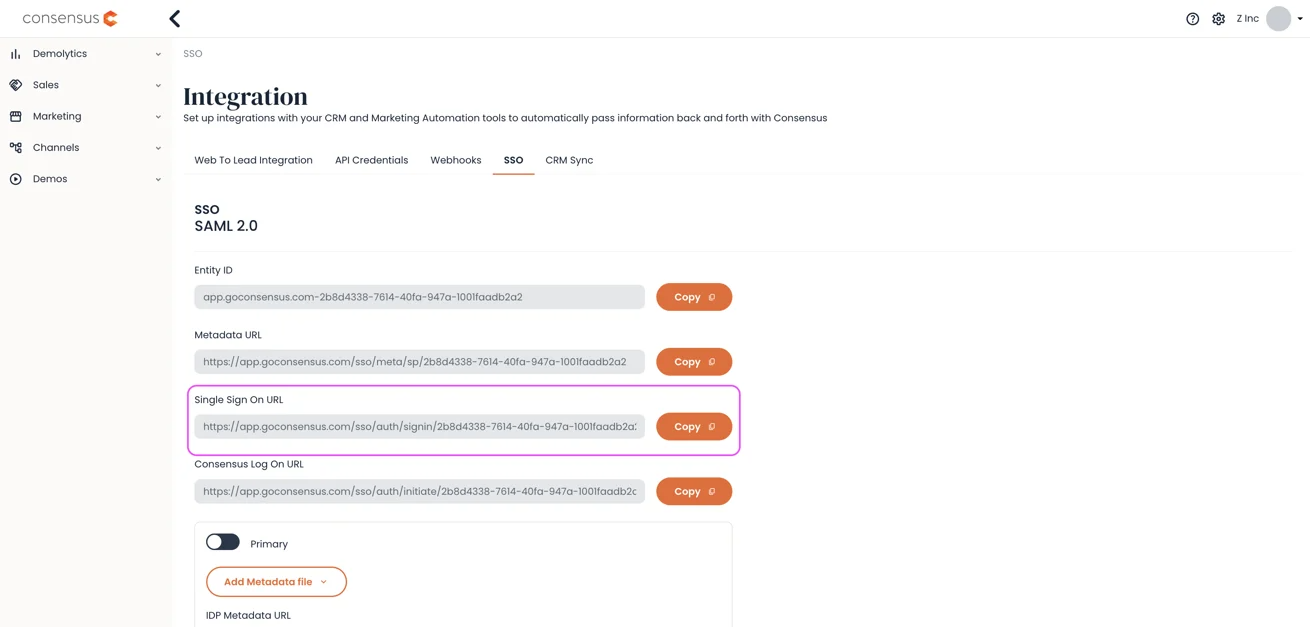
Single Sign On URL
3) In the field: Subject Type choose Custom Attribute.
3.1) In the Custom Attribute field select "Email SSO".
4) In the field: Name ID Format choose urn:oasis:names SAML:2.0:nameid-format:transient.
5) In the field: Issuer enter URL your org, for example https://test-dev-ed.my.salesforce.com
6) In the field: IdP Certificate choose Default IdP Certificate (make sure the Certificate is not expired, or else select a different Certificate that is not expired).
7) In the field: Signing Algorithm for SAML Messages choose SHA1.
- In the Custom Connected App Handler section:
1) In the field: Apex Plugin Class choose “ConsensusSSOPlugin” class from the package.
2) In the field: Run As choose your admin/integration user (must be a system administrator).

- Click Save.
- In the new window click the Manage button at the top of the Connected App.
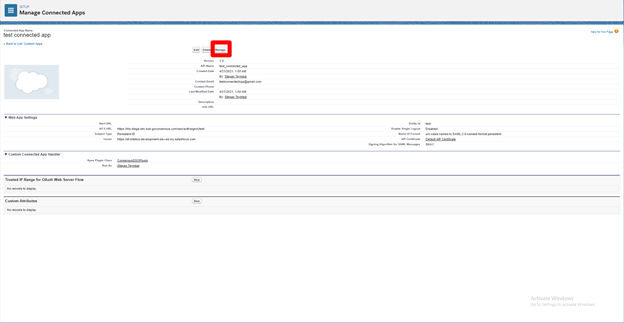
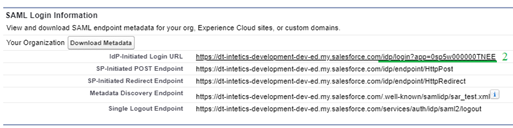
Manage Button - In the SAML Login Information section
1) Click "Download Metadata" to download the Metadata XML file.
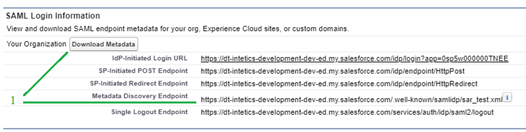
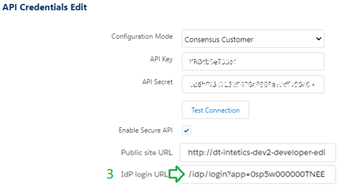
2) Get value from the field: IdP-Initiated Login URL (the part after your domain, for example /idp/login?app=0sp5w000000TNEE, so everything after .com)
3) Go to the Consensus WebApp > Settings > Integrations > SSO tab. Add the Metadata file and press "Save". (*NOTE* You do not need to make this your Primary SSO file if you already have SSO set up for your Consensus Account. You can press the orange + icon and add a secondary XML file for this step.)
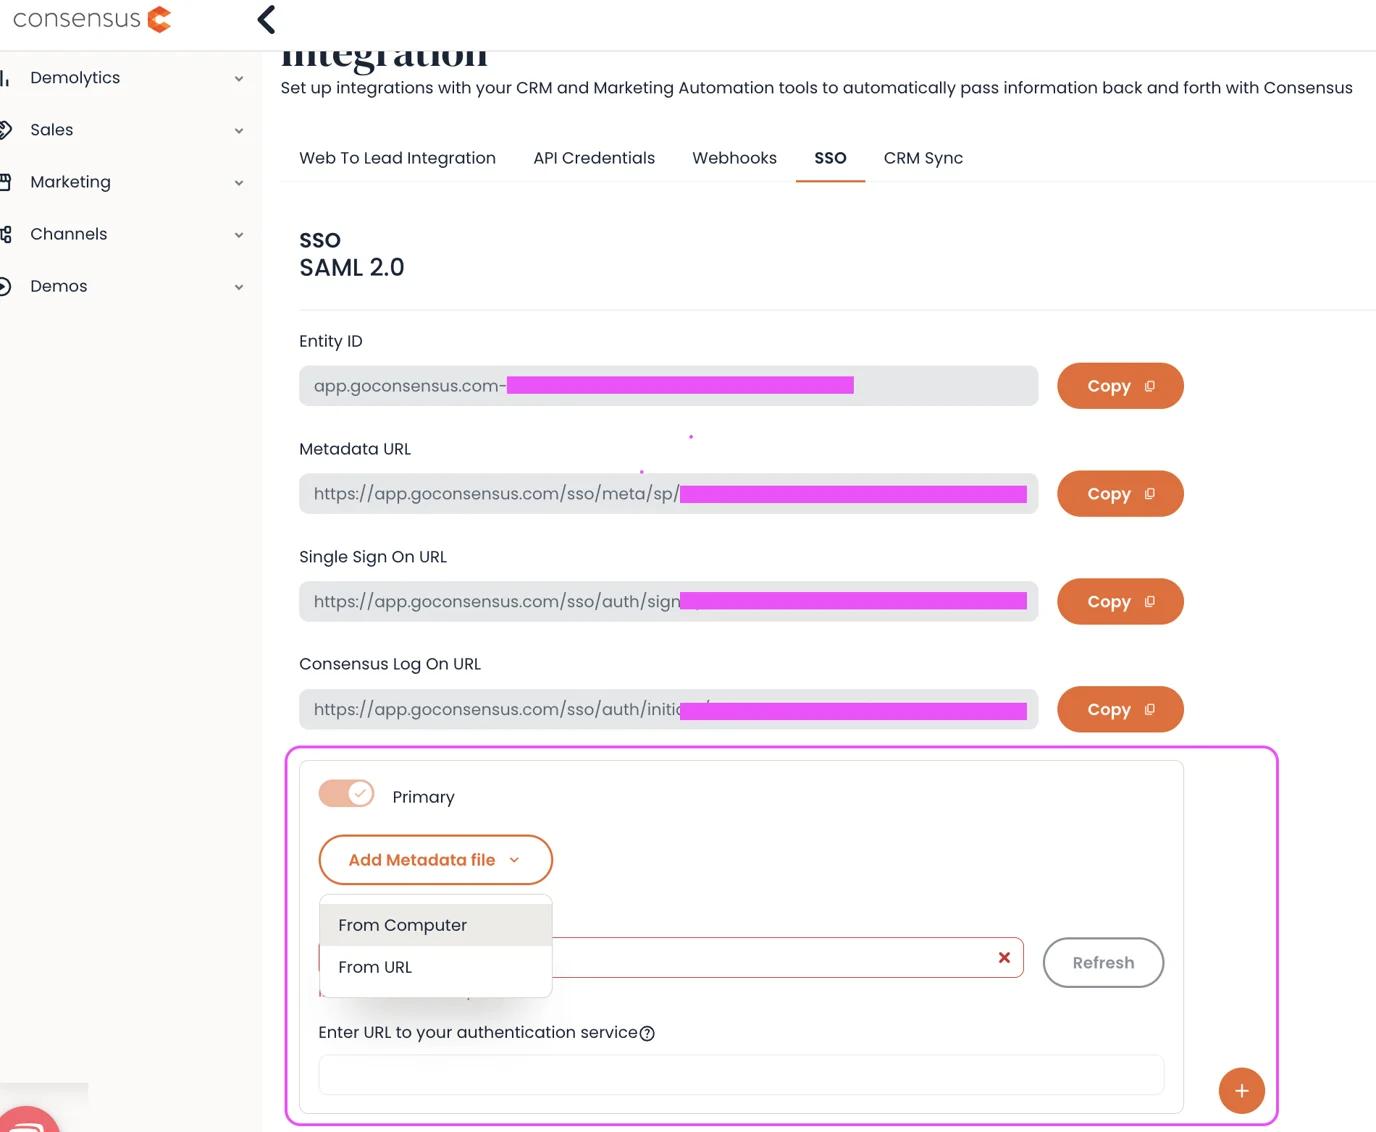
- Insert this value on the Consensus SFDC Configuration page in field: IdP login URL
- In the Profiles section click manage profiles

Profile > Manage Profile
1) Add profiles that will work with the application and click save.