
With the Consensus Tours Experience, you can Create or Clone Existing your product tour experience.
What is a Tour Experience?
This feature can be broken out into two major components: Tour Builder and Tour Player. This new feature allows users to have the ability to not only utilize video demos but also incorporate Tour Experience into the demo as well.
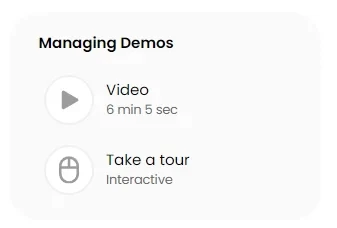
In the Demo Player, the tour experience has an easily recognizable “mouse” icon, whereas the video experience uses the “play” icon.
Tour Builder - This new feature will be integrated into the current Consensus Demo Builder that will allow users to build Product Tours as part of their demo. This new feature will be available for Single Experience and Standard Personalization Demos.
Tour Player - Viewers will be able to launch Tour Experience seamlessly and navigate the product experience using hotspots.
How to create Tour Experience Demos?
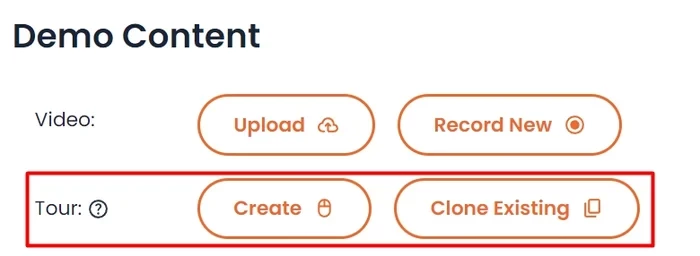
You can create Demos with Tour Experience through ‘Single Experience’ or ‘Standard Personalization Demo’. You will be able to view to create Tours as an option in the ‘Demo Content’ step. With the Tour Experience, you would have the option to ‘Create’ or ‘Clone Existing’ tour. However, if you noticed that the feature is disabled please contact support@goconsensus.com
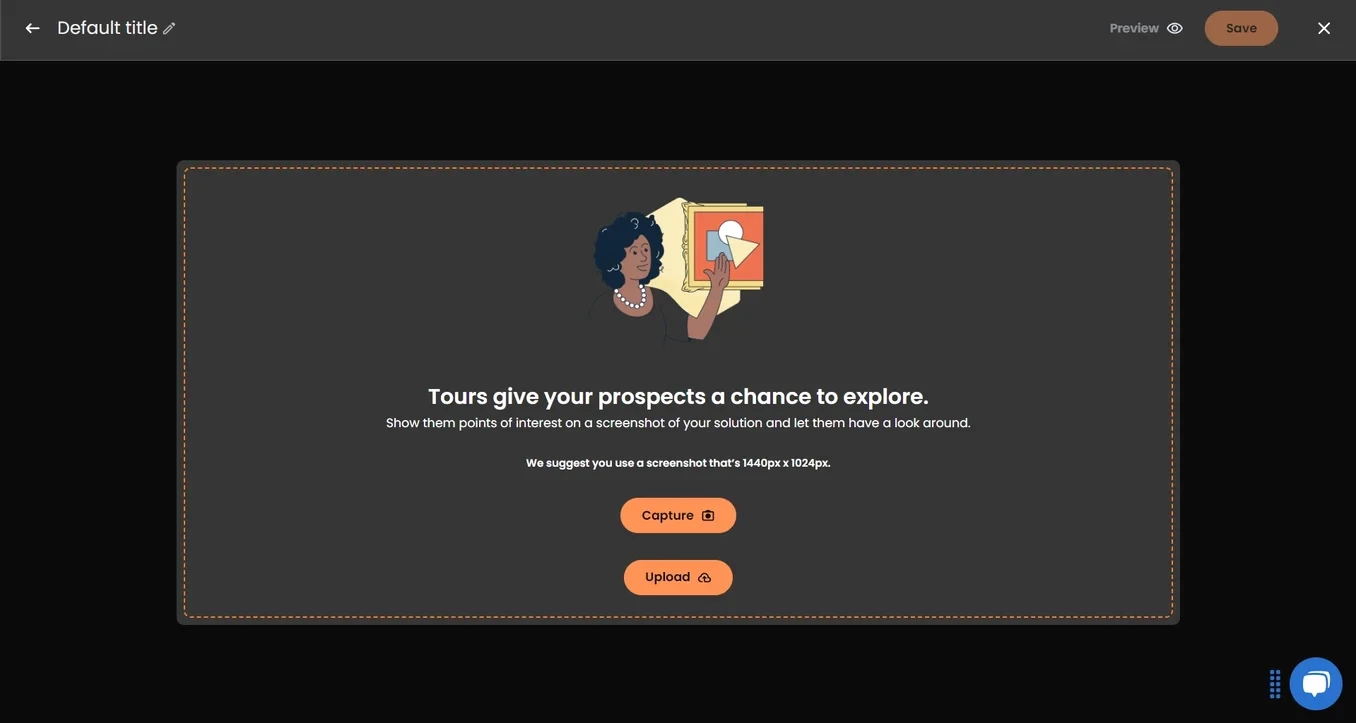
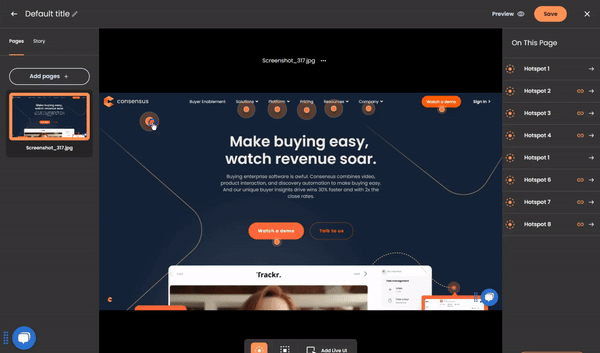
1. Once you select to create either ‘Single Experience’ or ‘Standard Personalization Demo’, you will see the feature “Tour”. Select create, and it will take you to this page to get started. You will have the option to Upload/Drag & Drop an image or use Consensus Capture extension to add the screenshot you want to showcase in your demo.
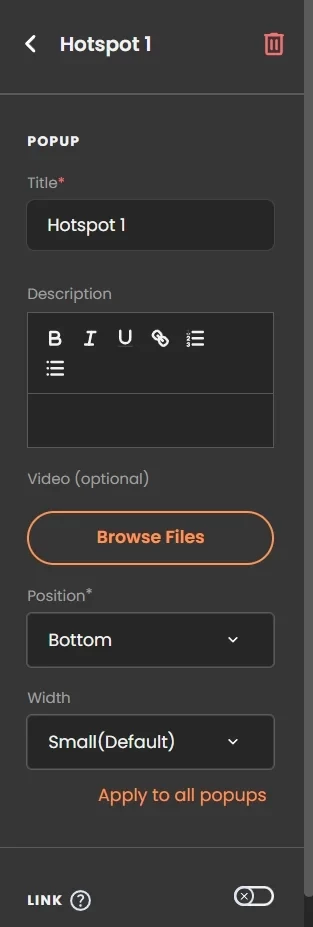
2. Within Tour Builder, you can rename the title of your Tour Experience. Note that once you upload an image, at any point you can cancel or replace the photo you picked.

3. Simply click on the screenshot to showcase your product with Hotspots with the desired Title, Description, Video (optional), Width, and the Position of the hotspots.
Drag and drop your Hotspot anywhere on the screen to get the desired location (as shown in the GIF below).
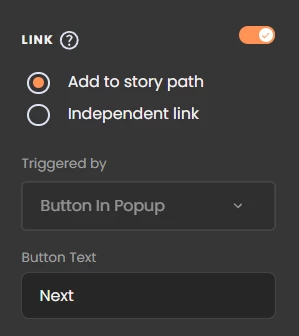
4. You can create a choose your own adventure style product Tour be changing your Elements to "Independent Links" or keep it a more linear traditional product tour be leaving your Elements as part of the "Story Path” which is toggled on by default.
-
Independent Link: Directs the viewer to a specific page within the Tour.
-
Story Path: Guides the viewer through a sequence of steps within the Tour experience. This creates a structured narrative or learning journey and acts as a roadmap, ensuring that users experience content in a logical order.
Story Path elements are automatically added to story path in the order it was created
You can reorder it in the Story panel on the left-hand side.
Independent Elements are NOT part of the Story Path as they can only link to pages within your Tour
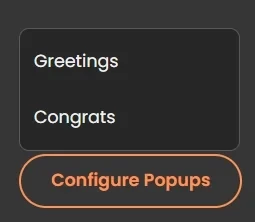
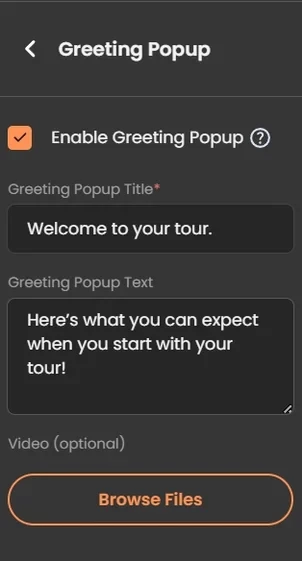
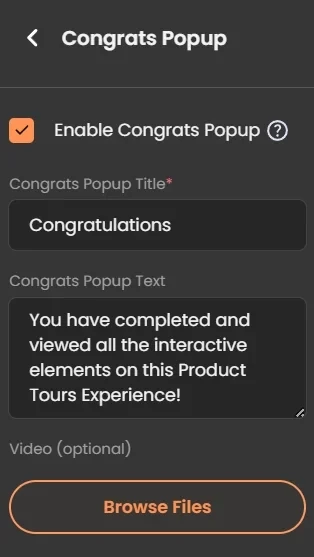
5. You can easily view your Tours within a few clicks, and users can choose to enable the Greetings and Congratulations pop-up at the start and end of the Tour.
6. Click 'Preview' to preview your created Demo. Publish your new Demo within a click and share it with all your prospective customers.

7. Finally, your Demo is now ready for your prospect viewers.