
Discovery Builder Overview
Consensus’ Discovery Builder provides a unified, personalized product experience for B2B SaaS buyers. It connects Tours, Video Demos, and Simulations in one link. This link can be sent to buyers or embedded throughout the buyer's journey, from initial contact through expansion. It allows for personalized exploration, catering to different buyer types (executive, manager, end user, etc.), helping them understand your value and accelerating deals to close.
Which Roles Have Access
By default the following roles will automatically have Discovery Demo Creator permissions on:
- Admin
- Content Manager
- Content Author
- Public Link Manager
Learn how to enable Discovery Demo Creator on custom accounts in this knowledge base article.
How to Build a Discovery Demo
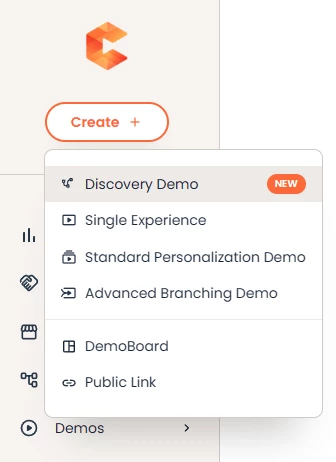
Find Discovery Discovery by clicking on Create > Discovery Demo in the left navigation.
Follow the step-by-step prompts to create your Discovery Demo.
1. Name your demo. Add an internal name and description to help your team understand what the demo is, and use an external name that will show to viewers.
2. Set your brand settings. From here, you can set the language of the demo, add your logos, and create a branded experience by injecting your brand colors into the demo player. Set the contact information for the main point of contact connected to that demo.
- Important note - ALL Dynamic Tour brand settings will be set on step 2 except the recording target, which is set in the ReachSuite portal’s brand settings.
Another important best practice is BIR - Background Image Required. Upload a background image in Step 2 so the buyer doesn’t experience a plain grey background.
3. Add Content to the Demo. Start by uploading an optional intro video then click on “Build a new Discovery Demo” to open the Discovery Demo Builder, or Discovery Builder for short.
- Remember, you can leave the intro video blank and encourage your sellers to upload their own personal intro video (PIV) when sending out this Discovery demo as a DemoBoard.
Using the Discovery Demo Builder
The Discovery Builder contains two types of building blocks. Interaction blocks and your previously created content.
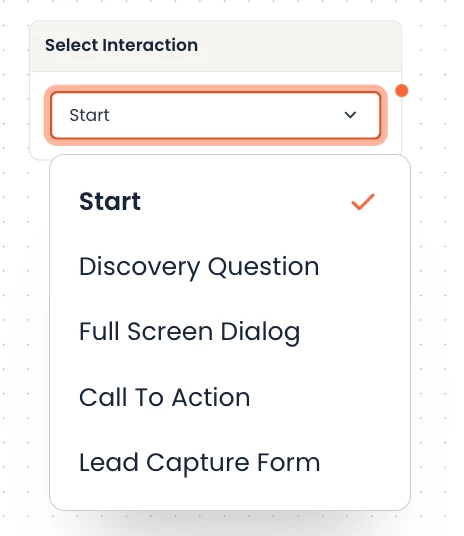
The Interaction Blocks are:
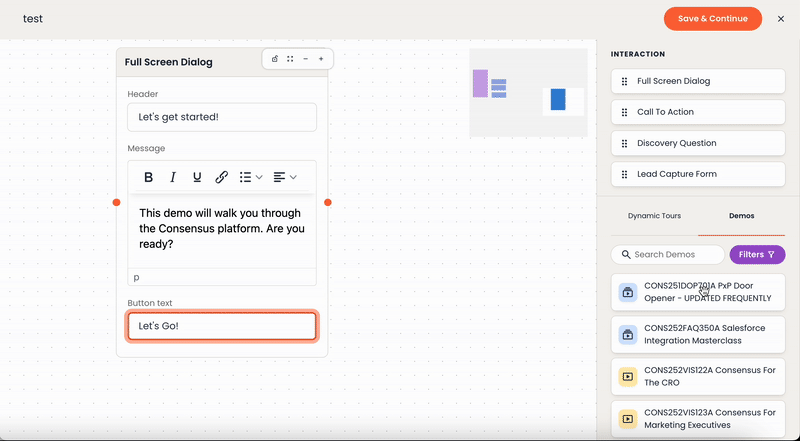
- Full Screen Dialog: A full-screen takeover with text that can set context, introduce a concept, or include any other text-based information you want to include.
- Call to Action: Direct the viewer to a Simulation, website, or any other outside URL you would like them to visit.
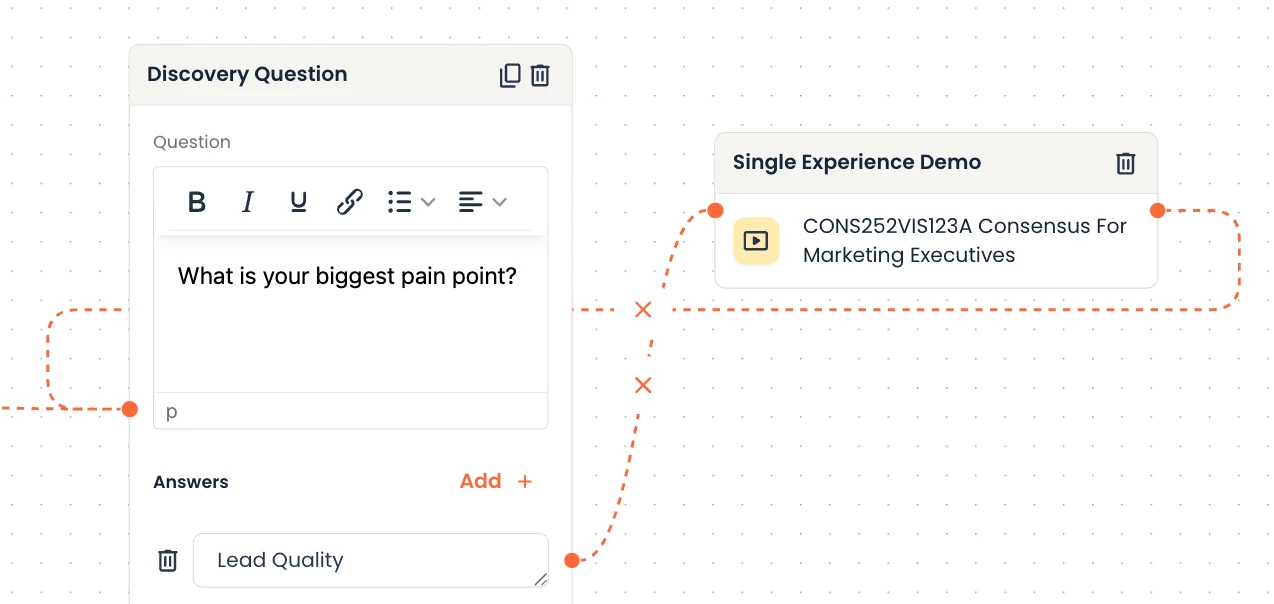
- Discovery Question: Prompt the viewer to answer a question that leads them to the next step in the Discovery.
- Lead Capture Form: Your standard Consensus Lead Gate that prompts the viewer to provide their contact details. This will replace the lead forms that exist within your previously created content.
The previously created content you can use are:
- Consensus Demos*
- Standard Personalization Demos
- Single Experience Demos, including those with Video, Story Path Tours, or Dynamic Tours
- *Advanced Branching Demos are not available in Discovery Demos.
- Stand alone Dynamic Tours previously created in ReachSuite’s portal.
- ReachSuite Intelligent Disco Flows are not available in Discovery Demos.
Using these content blocks, you can create branching paths to create curated experiences depending on how the viewer interacts with the demo. Discovery Builder automatically has a starting building block you can use as a jumping off point. You can keep it as “Start” or select one of the four interaction blocks:
After choosing how you would like the demo to start, you can drag and drop elements into the canvas.
- Filter and search for Dynamic Tours or Demos from your Demo Library, select, then drag and drop onto the canvas.
- Connect elements together by clicking on the orange dot next to to create pathways through the demo.
-
- In the Discovery Builder, you can also drag and drop any block to the beginning node of a previous block to send the user back to that previous place in the Discovery demo.
-
Tips for Discovery Builder:
- Building blocks can be sequenced in any order.
- While there are no limits on the number of questions, best practice is 5 or fewer questions.
- Use the CTA interaction block to link to Simulations at the end of the demo.
Click “Save & Continue”
Complete the Demo Steps
4. Update the Share Button label or keep it as “Invite Others”
5. Add a static Call to Action that will remain visible throughout the player experience.
6. Finalize the creation of your Discovery Demo and use the preview link to see what the viewer will experience.
- Important: A thumbnail will not be automatically chosen for you so you will need to upload your own. You can use the background image from the Demo Settings on step 2.
After finalizing. remember to Publish the demo so others can use it! Unpublished demos are hidden from most user’s view. You can also heart it using the pink heart emoji to favorite it and add it to your favorite folder.
Discovery Demo Example Use Case:
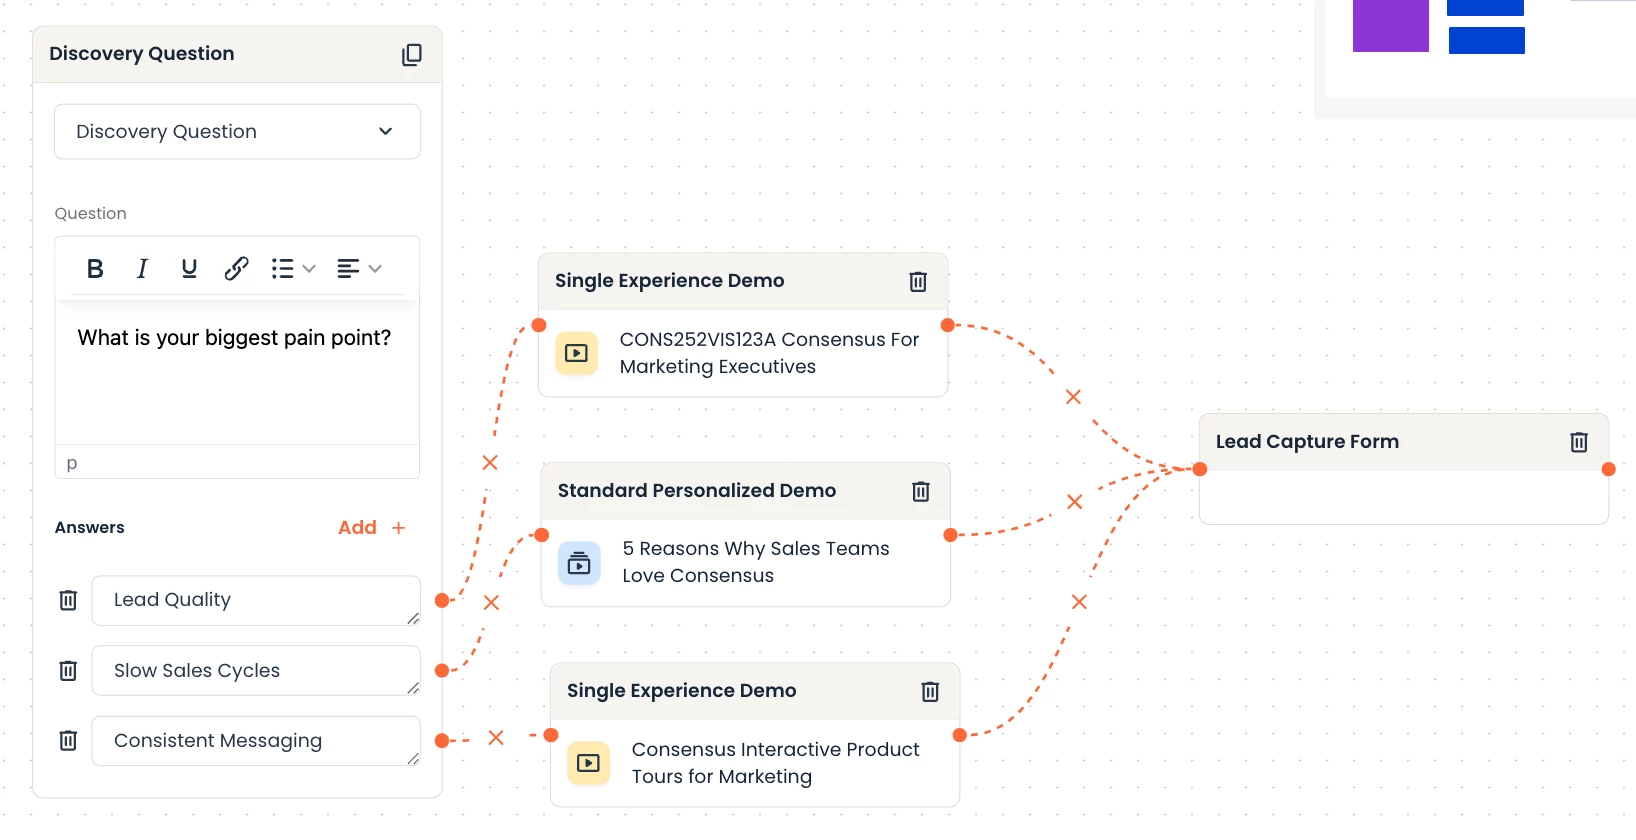
- Automate Discovery: Learn about the buyer before ever speaking to them by asking important discovery questions during the demo. For example, begin your Discovery Demo with a question asking, “What’s your biggest pain point?” that points them to the appropriate solution.