
Our Chrome Extensions, Snap, allows users to quickly create a Personalized DemoBoard from within their Gmail Account.
First, you need to download the Chrome Extension from the Chrome Webstore (download here). Once you've downloaded the extension you'll log in to Snap using the same Login Credentials you use for the main Consensus Platform.
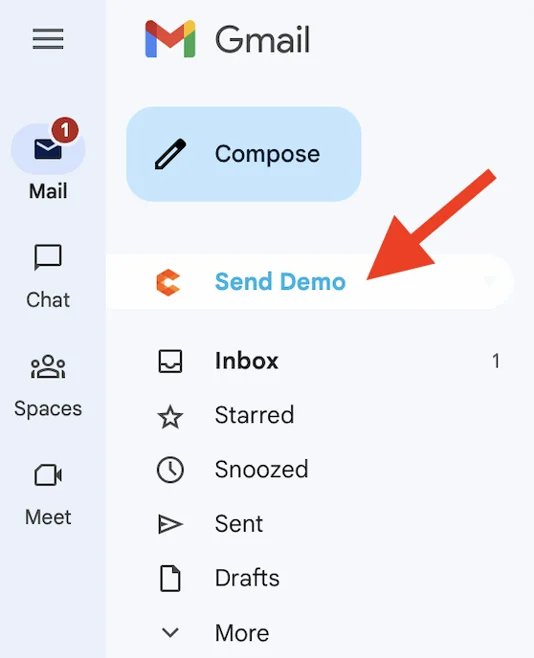
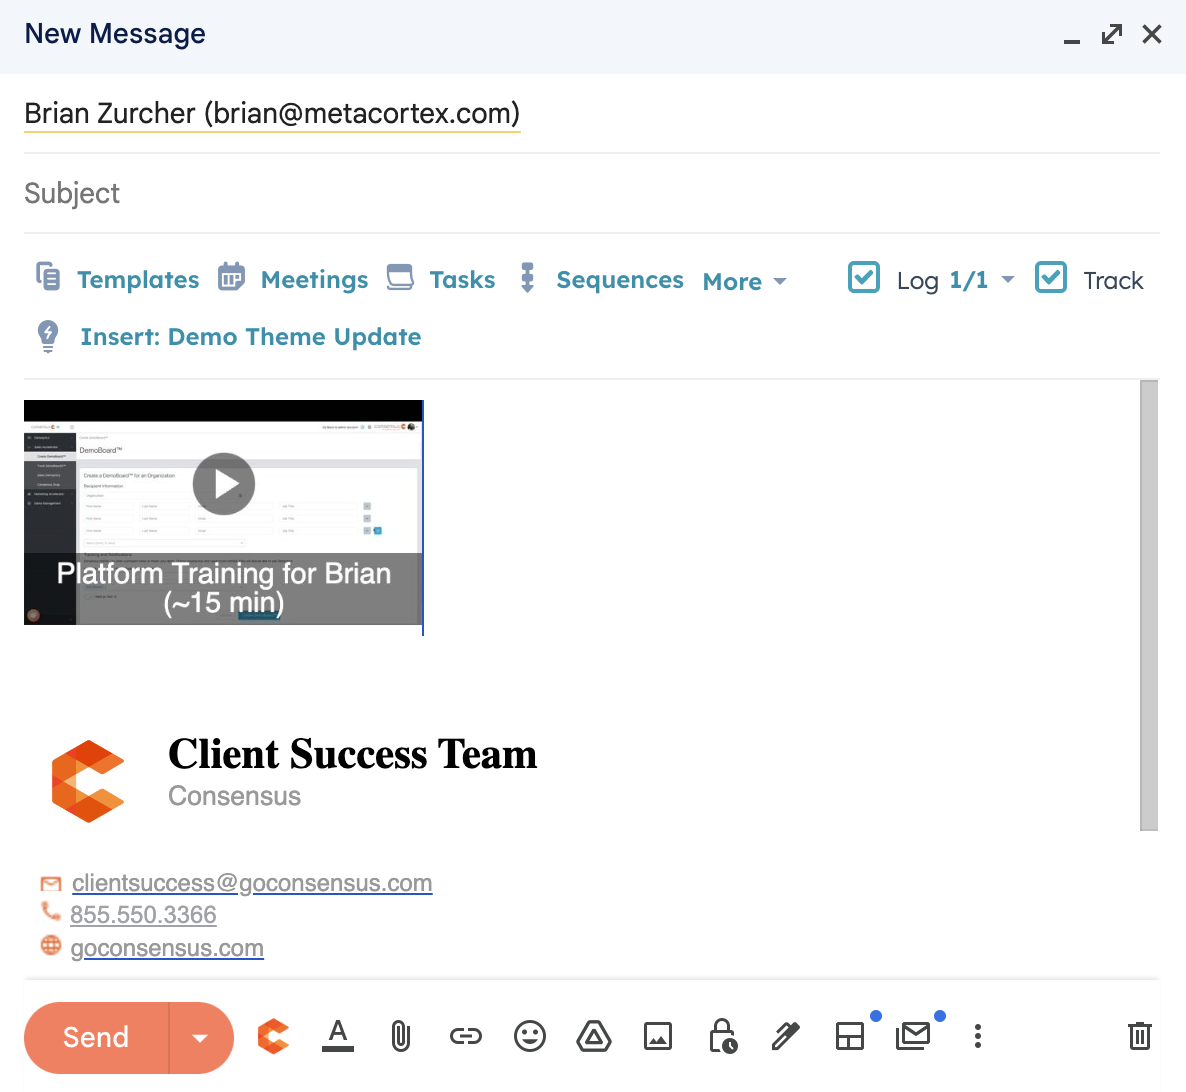
Next, you'll go to your Gmail account, and there will now be a "Send Demo" button beneath the Compose Email button. Also, you'll see the Consensus Logo at the bottom of your email when in composition mode:
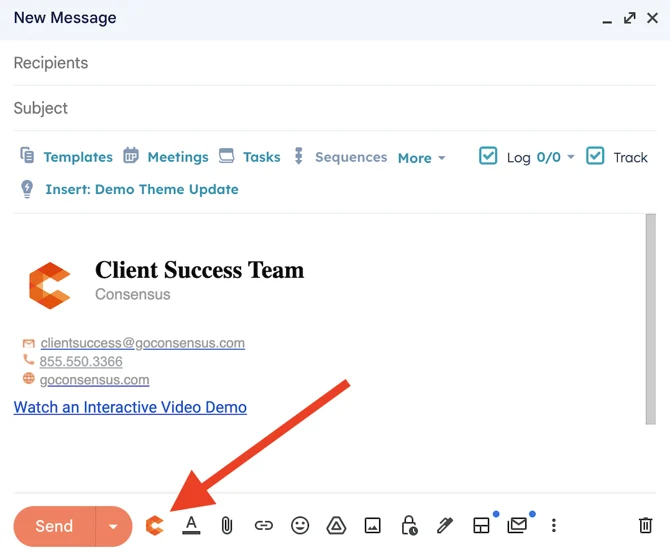
To create a DemoBoard within Gmail, you'll start by adding the Recipients and then compose your email. When you're ready to insert the Personalized DemoBoard for this client, click on the Orange Consensus Logo (located next to the Send Button).
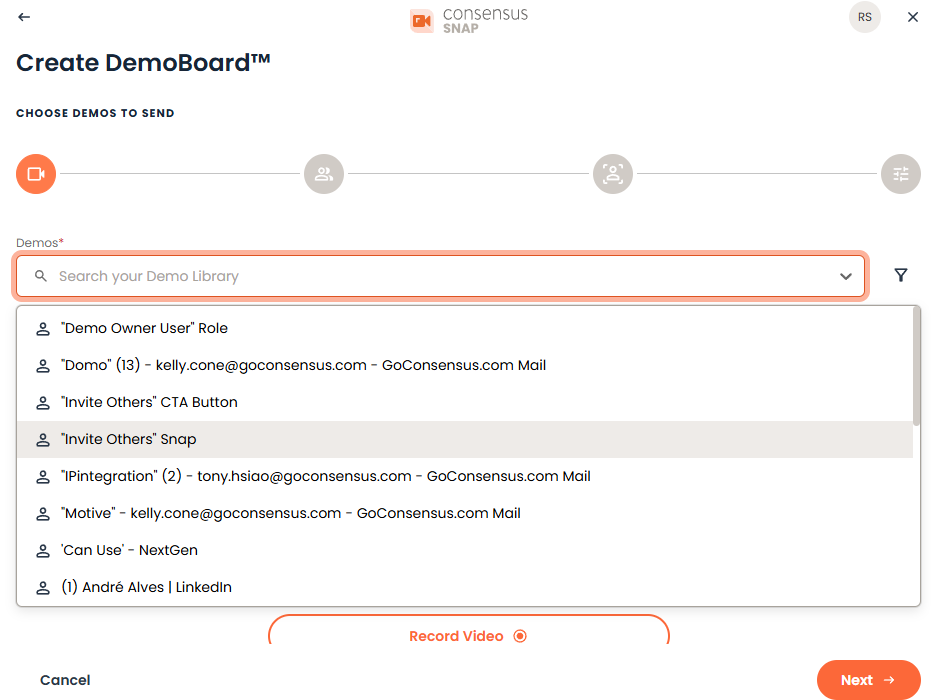
Next, utilize the search bar to select the demo for which you will create a DemoBoard.
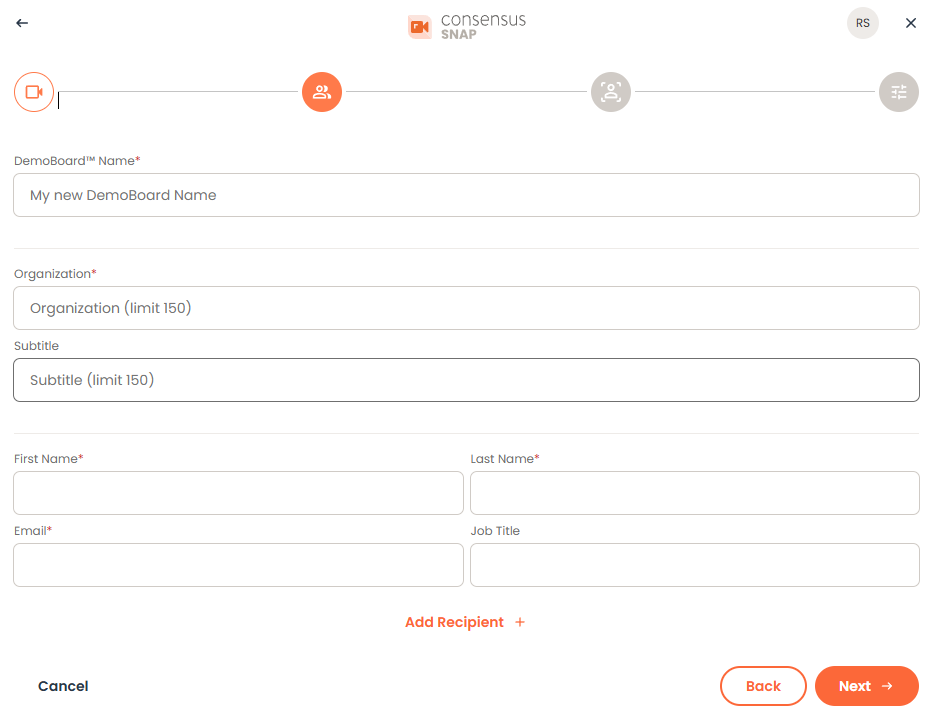
Now, you'll add the user's Company Name and their contact information (you can add multiple prospects in this stage by clicking on the Add Recipients + ). If you have already added all of your recipients in the 'To' field of the email, Snap will populate the first name, last name, email, and company name from the recipient's email address. However, you will want to double-check and make sure everything is correct. If you have not input the recipient in the 'To' field, you will need to input this information manually.
The final step is to choose which DemoBoard CTA you're going to use (we recommend using the Image Link and adding the prospect's name (or company name) and how long the demo is going to take them to view (use your best guess here):

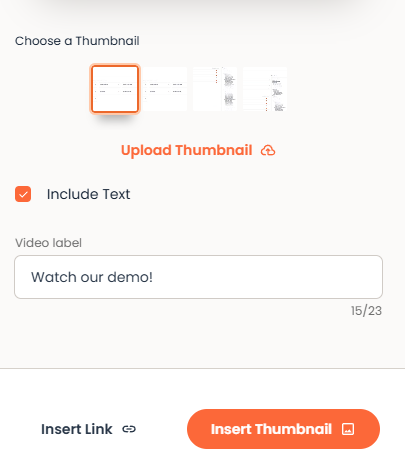
Now simply click the "Insert Thumbnail" button, and wherever your cursor is placed within your email is where the CTA will populate:
All of the tracking and notifications will be exactly the same as what you're getting within the main Consensus Platform (any DemoBoards created in Snap will also appear in your Track DemoBoards section in the main Platform).