
The best-performing demos share three key characteristics: 1) they're personalized, 2) they have feature cohesive branding that helps create a genuine look and feel that viewers want to engage with, and 3) they are delivered at the right stage of the buyer's journey.
Demo Themes removes the hurdle of granularly applying colors and logos to each demo by providing a one stop shop solution where admins can configure themes according to branding guidelines and users can choose between themes when creating demos.
Skip to a Section:
Get started with Demo Themes
By default Admins will get Themes management rights, which they can extend to custom roles to help them manage Demo Themes.
This new permission allows admins and custom roles to see the Themes Management tab in Global Demo Settings.
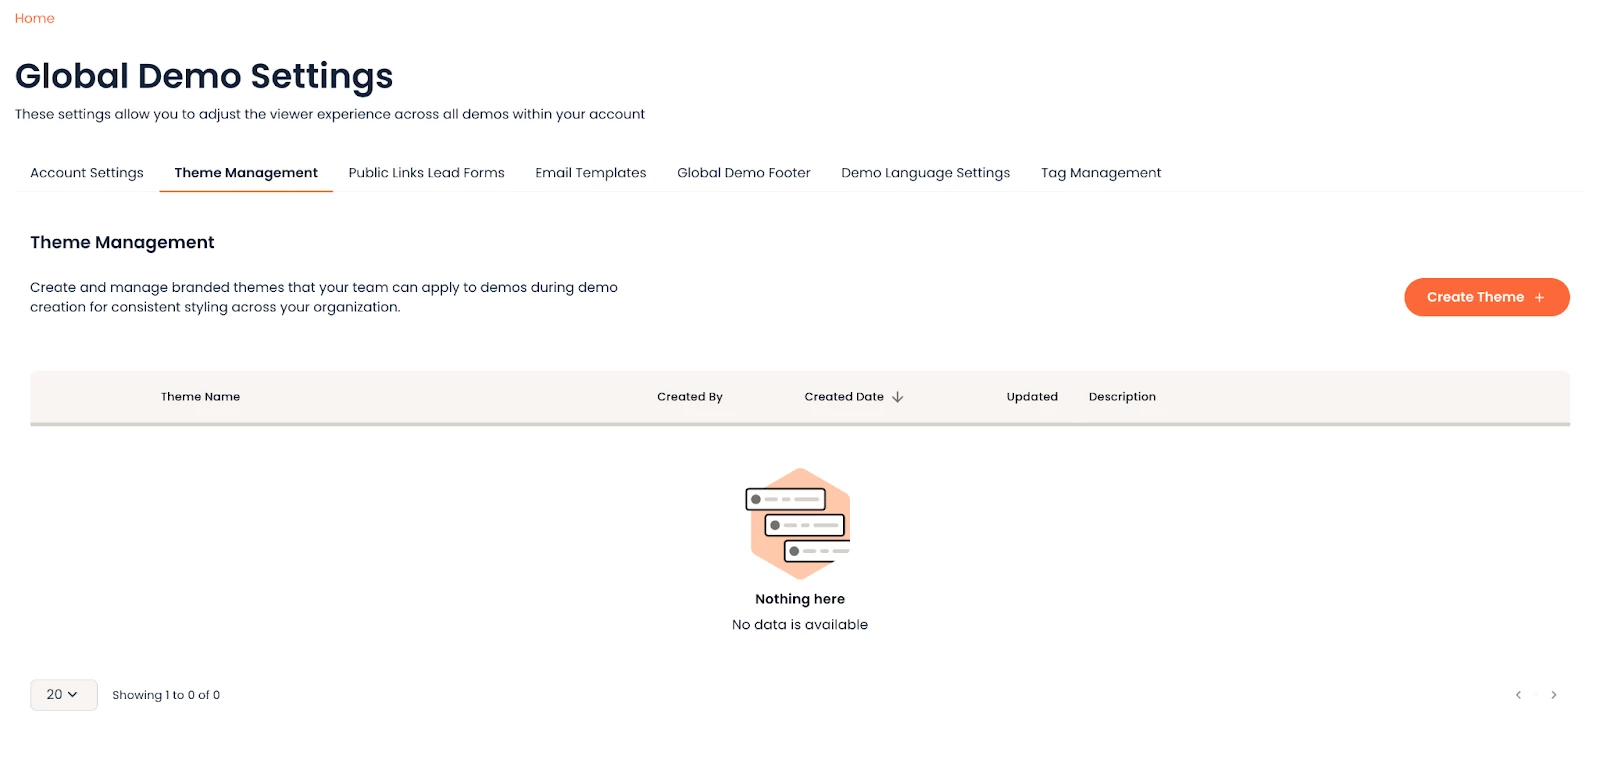
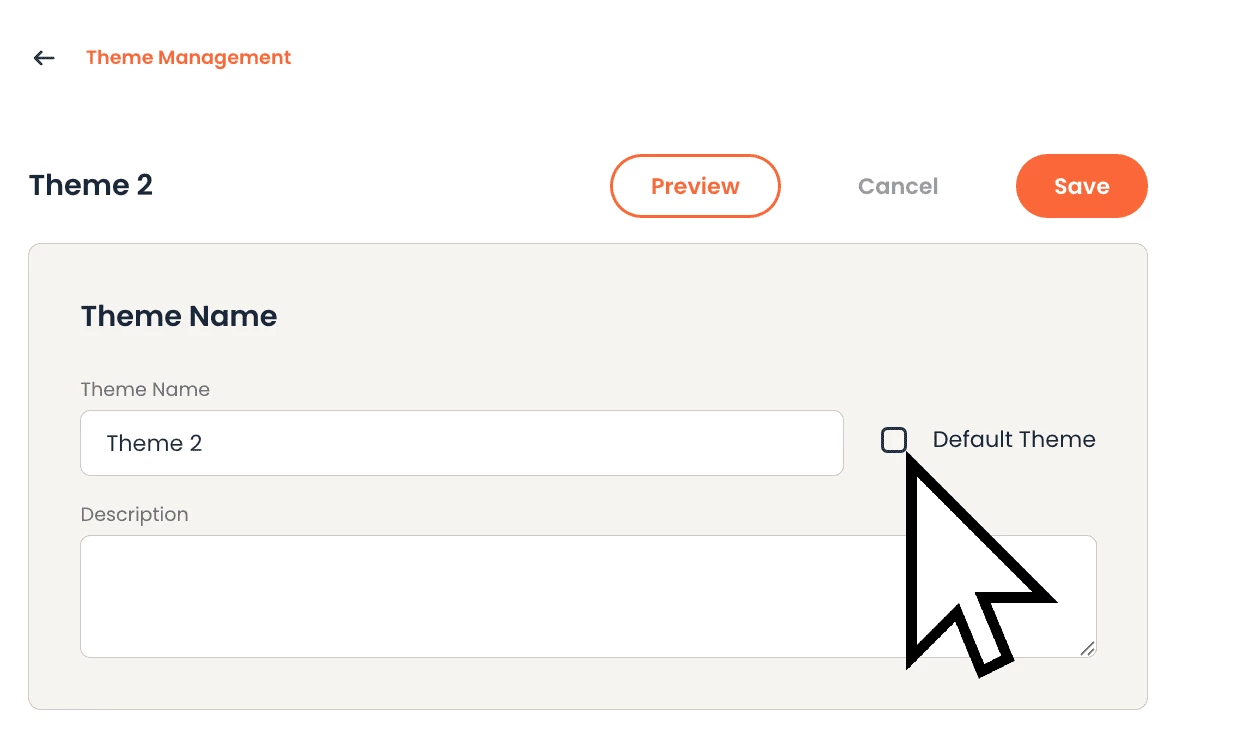
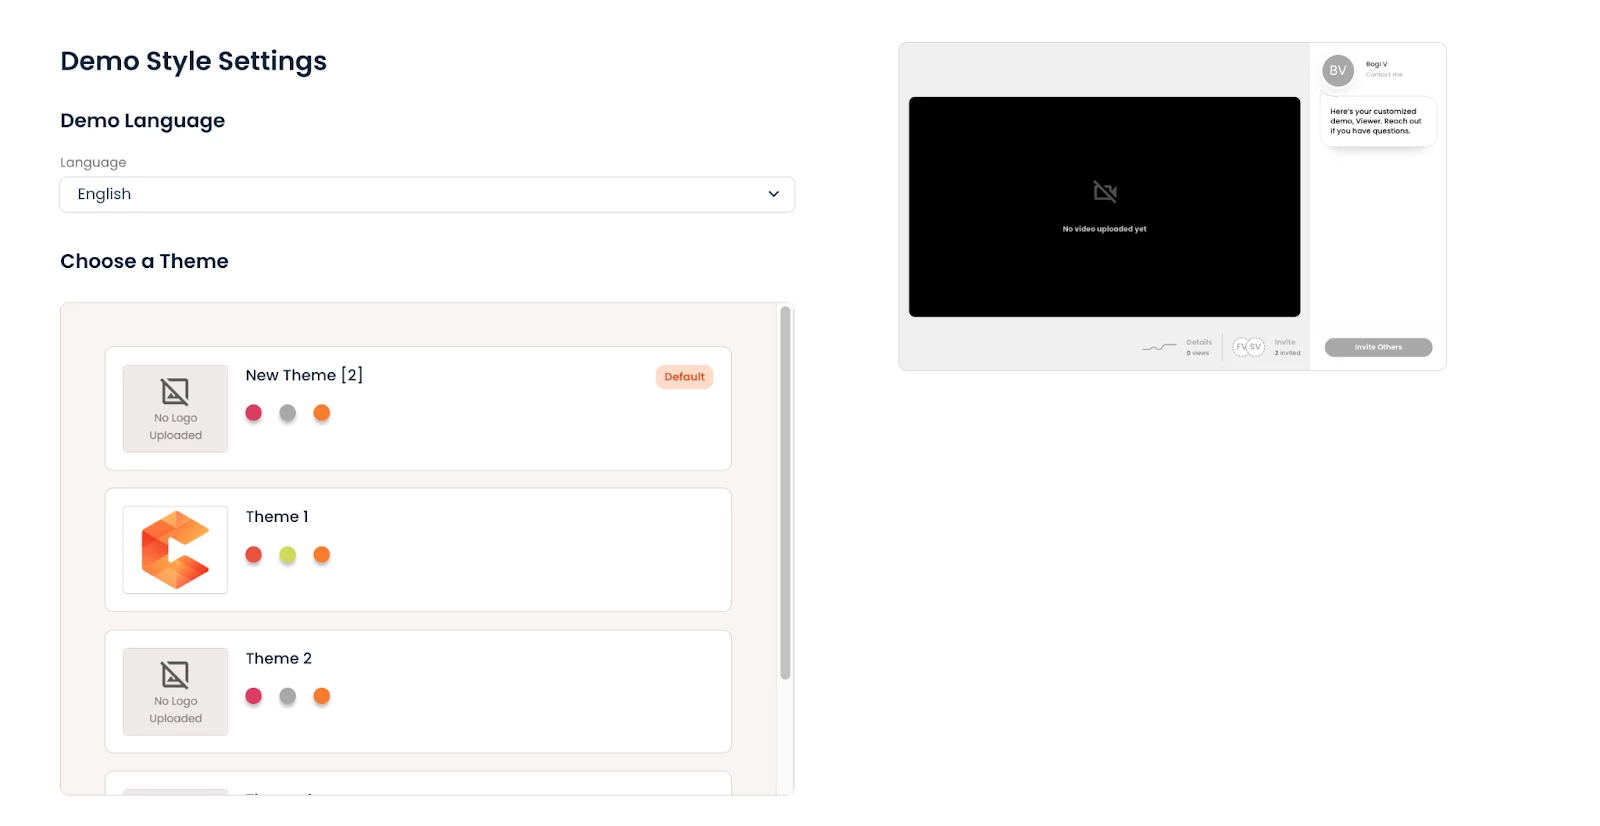
To create your first theme, click on the “Create theme” button and you’ll be redirected to the Theme builder page where you can upload your logos and configure your corporate colors. The only required field on this page is “Theme name” field and any additional info you wish to include is added in the “Description field”.
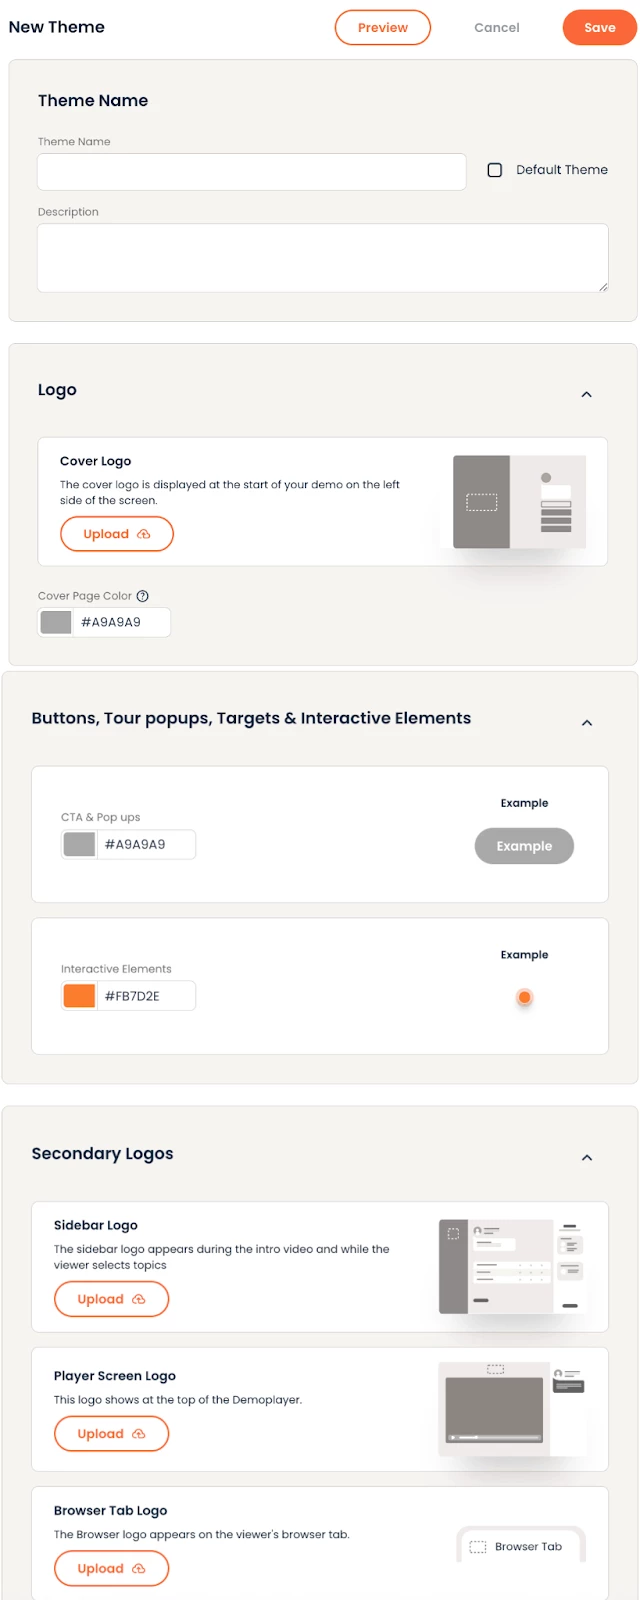
Your logos and colors are configured in the following sections:
- Upload cover logo: This is where you add your logo that will appear on the first page buyers will see when they are sent a demo. It is best to use a transparent image file, like a PNG.
- Cover page color: When adding your brand color, keep in mind the logo you uploaded in the previous step. You want to ensure the logo is easily visible on top of the color chosen.
- Buttons, Tour popups, Targets & Interactive elements: configure the colors for your CTAs and popups.
- All additional logos are configured in the Secondary Logos section, where you can add:
- Sidebar logo: appears during the intro video and while the viewer selects topics
- Player screen logo: appears at the top of the player
- Browser tab logo: appears on the viewer's browser tab
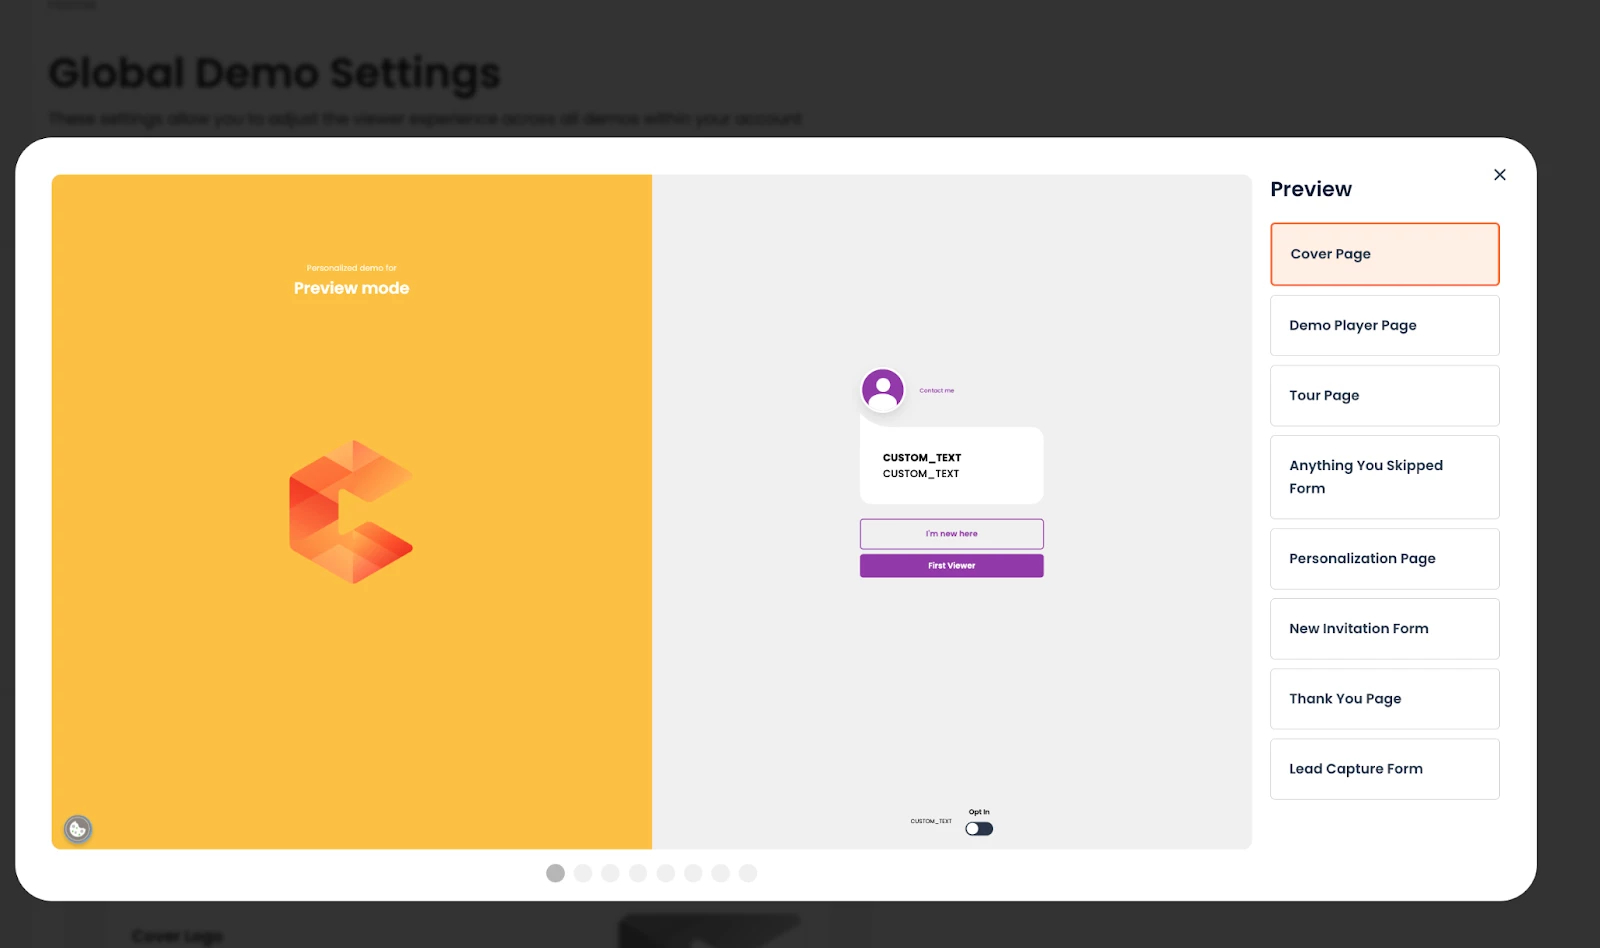
Preview
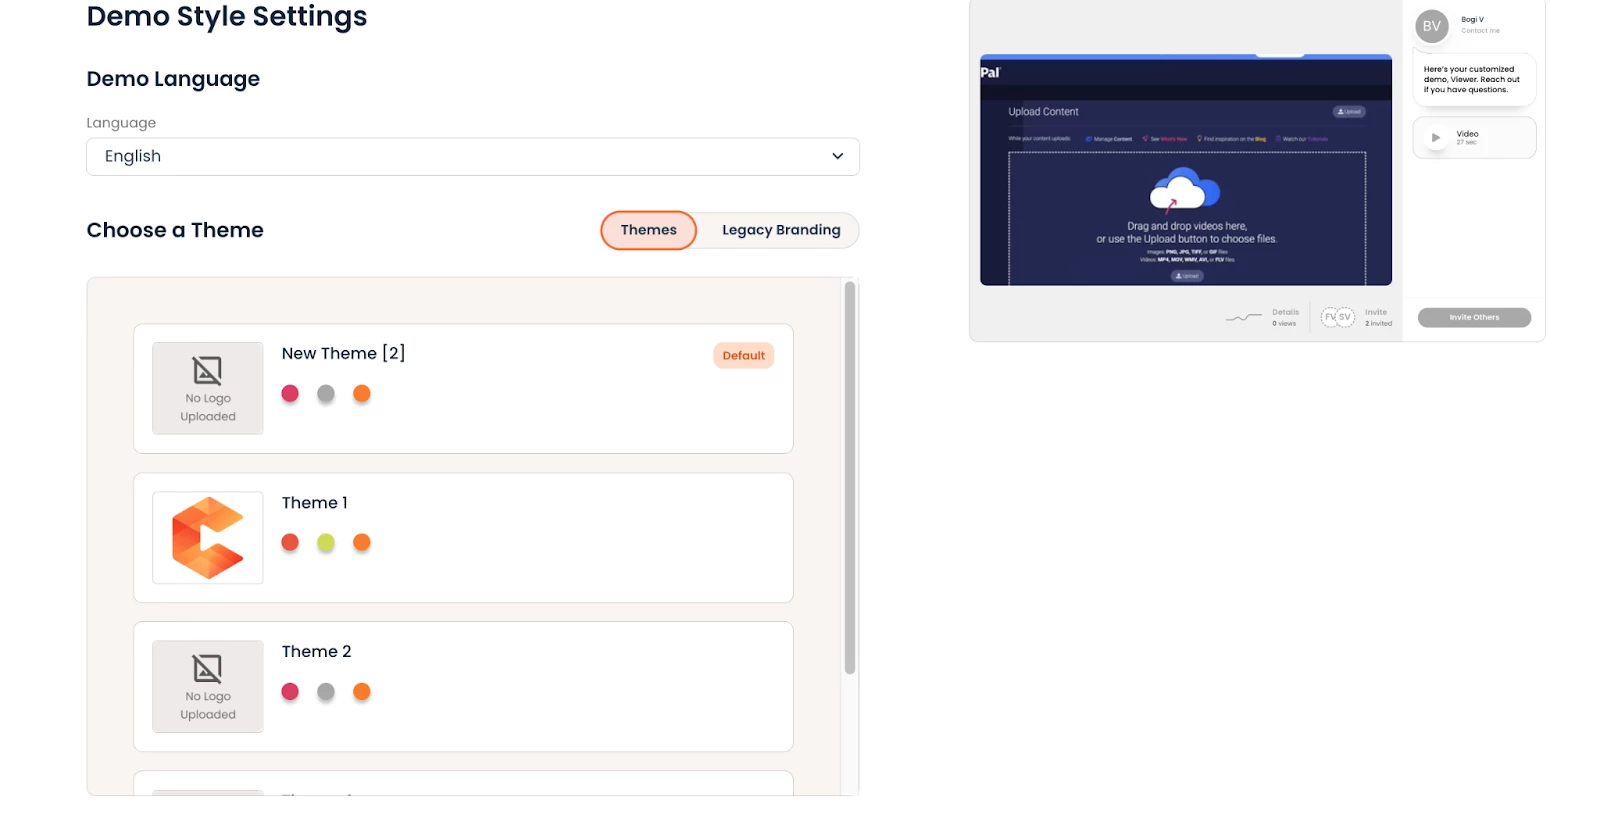
While configuring your theme, use the Preview form within the builder to confirm your theme looks right. Simply click the Preview button to see how your branding appears at every step of the viewer's journey through the demo player. Use the right-hand navigation or the carousel to navigate between screens.
Active and Inactive themes, Default theme
Demo Themes can be active or inactive. Active themes appear in Step 2 of the demo creation process for your users to use, while inactive themes remain hidden. This allows you to make themes available to users only when they're ready, while continuing to configure inactive themes in the background.
Your first theme is always going to be the Default theme for your organization and it’s always active. This is the theme which your presales and sales peers use most frequently for their demos. An organization can have multiple themes, but only 1 default theme and it cannot be deleted and or deactivated.
| Theme Status | Visible to users? | Can be applied to demos? | Can be deleted? |
| Default (Active) | ✅ Yes | ✅ Yes | ❌ No |
| Active themes | ✅ Yes | ✅ Yes | ✅ Yes |
| Inactive themes | ❌ No | ❌ No | ✅ Yes |
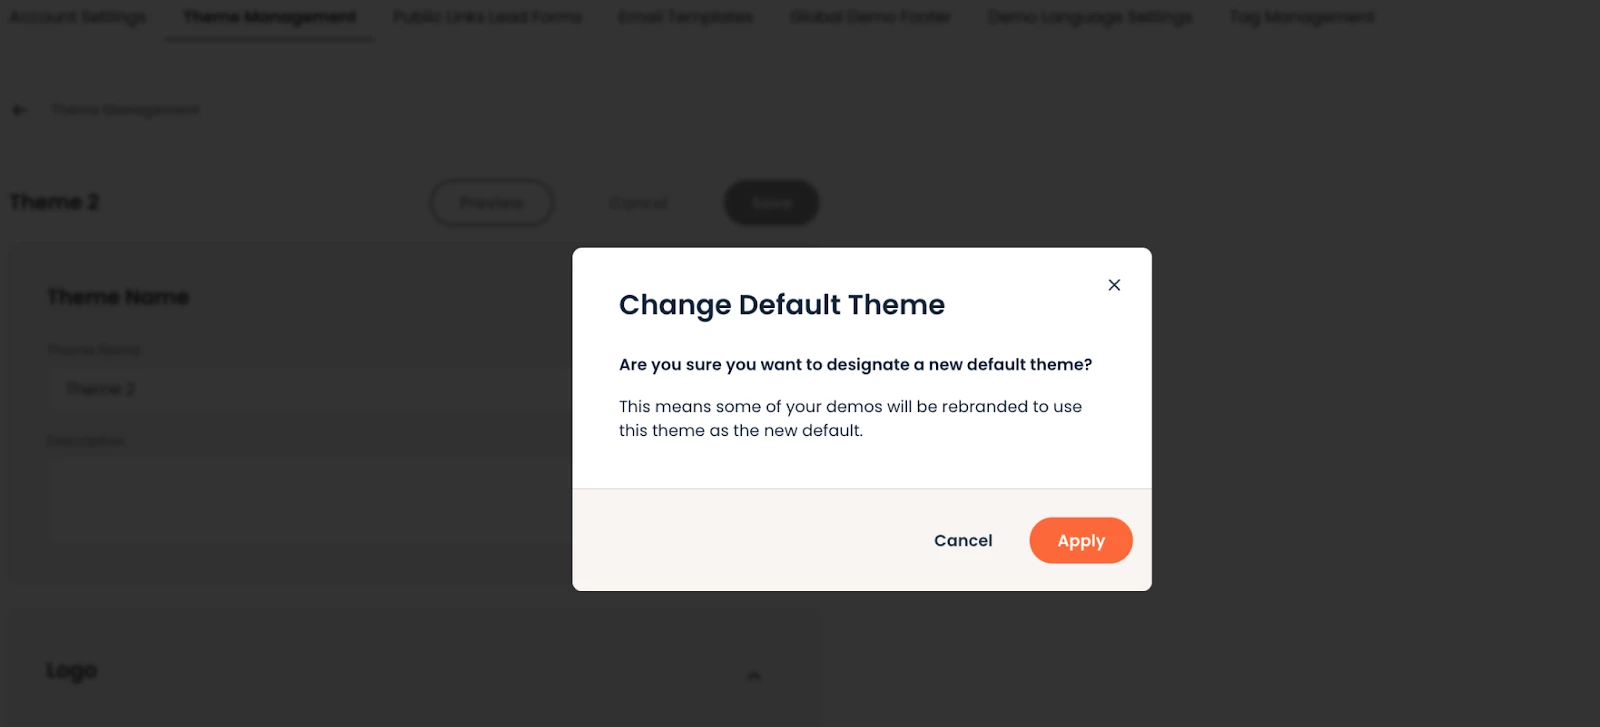
When you save this first theme and go back to the Themes table, you’ll find it marked as a Default theme. You can change the default theme and all the demos using the branding will be reassigned to the new default you select.
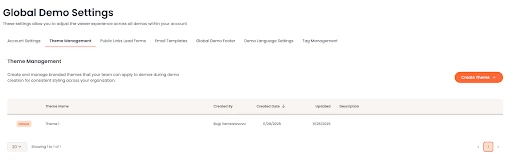
Any other themes you create will show in the Themes table as inactive by default.
Active themes appear in Step 2 of the demo creation process for your users to use, while inactive themes remain hidden. This allows you to make themes available to users only when they're ready, while continuing to configure inactive themes in the background.
When your inactive theme is ready to be used for demos, simply turn on the toggle from the Themes table:
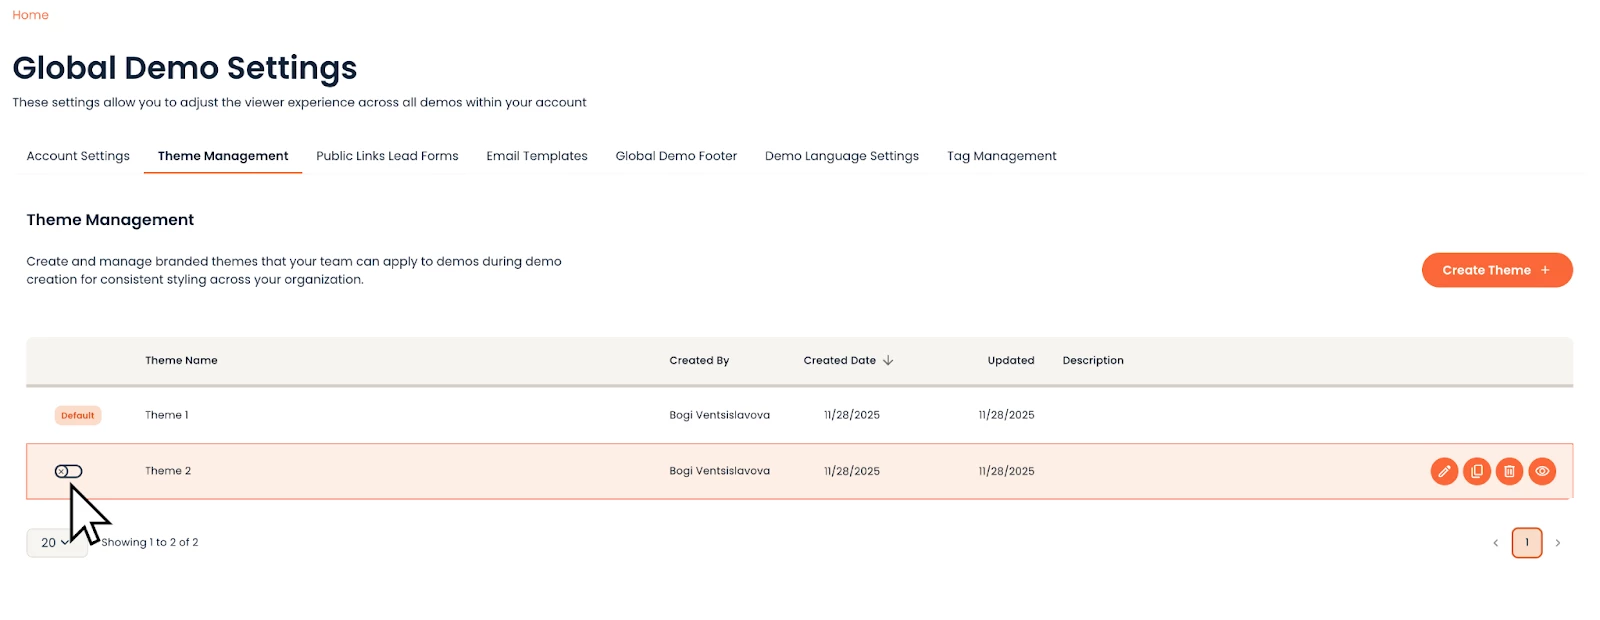
Once enabled, the theme appears in Step 2 in Demo Builder like all other active themes.
Change the Default Theme
To change the default theme go to the theme you wish to make the new default. In the Theme builder select the Default theme checkbox:
You’ll be prompted to confirm the change and reminded that all the demos that use the current default theme will start using the new one.
You can make inactive themes default, which will change their status to active.
Themes table actions
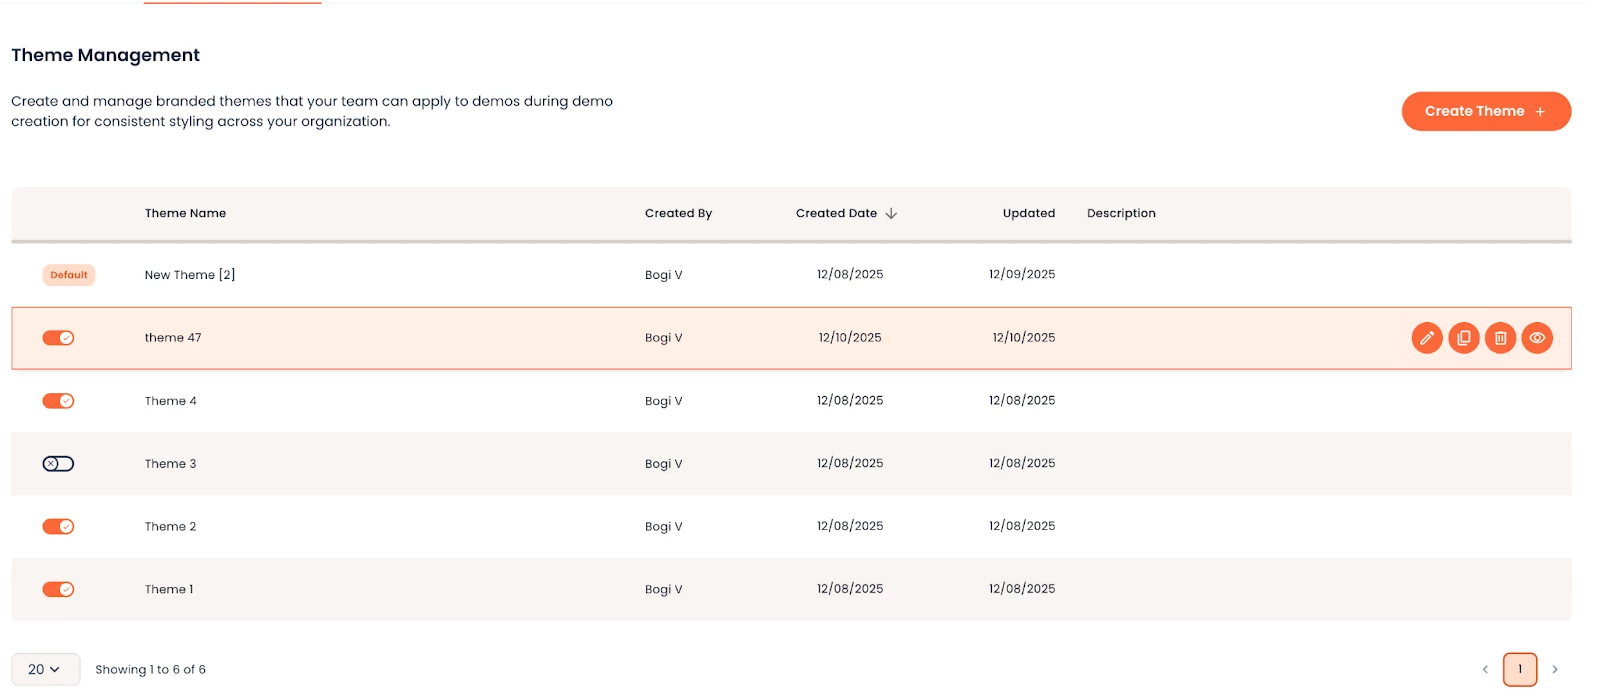
Every theme can be edited, copied or deleted. The default theme is the only exception, because it cannot be deleted. You need to first choose a new default in order to delete the current one. You can quickly preview themes from the table with the Preview action which will render the preview window.
Enable Themes for Users
Before your users can start using Demo Themes, admins need to complete two steps:
- Step1: Create at least one active theme (this becomes your Default theme automatically)
- Step 2: Enable the Themes feature from Account Settings via the Demo Themes toggle
Before you enable, understand:
- ⚠️ This cannot be undone. Once enabled, themes become the primary branding method for your organization and your resellers.
- The Themes interface will immediately appear in Step 2 of the Demo Builder for all users, including resellers.
- However, theme availability differs by user type:
- Internal users see your organization's active themes immediately
- Resellers must create their own themes before they can use this feature (they won't see your internal themes)
- However, theme availability differs by user type:
- New demos will use themes by default
- Existing demos can be migrated from legacy branding to themes
⚠️ Before you turn on the Demo Themes toggle - Decision Checklist
- At least one theme is fully configured and ready to use
- Your team understands themes are now the default
- You have a plan for migrating existing demos
- (If applicable) Partners have been notified they'll need to create their own themes
When you're ready, toggle on Demo Themes to roll out this feature.
How to Use After Themes are Enabled
For net new demos:
When users create a new demo and reach Step 2, they'll see a Themes box where they can select from any active theme. Legacy branding settings are no longer visible for new demos.
For existing demos:
When users edit a demo that was created before themes were enabled, they'll see a Themes/Legacy toggle in Step 2. This allows them to:
- Keep the existing legacy branding (view only - no edits allowed)
- OR Switch to a Demo Theme
Important: Once a user selects to apply a theme, that demo permanently switches to the new themes setting. They cannot switch back to legacy branding.
For existing demos using Themes:
Users will only see the Themes box and can switch between any active themes.
Creating new demos:
| Admin setup | What users see in Demo Builder |
| ✅Active themes exist | Themes - users select from active themes |
| ✅ Active theme exists ❌ Themes toggle NOT enabled | Legacy branding settings - users configure colors/logos manually |
| ❌ No active theme yet | Legacy branding settings - users configure colors/logos manually |
Editing demos:
| Admin set up | What users see in Demo Builder |
| ✅ Themes enabled | Themes/Legacy toggle - users can switch from legacy to a theme (one-way change) |
| ❌ Themes NOT enabled | Legacy branding settings - users configure colors/logos manually |
💡 Important: Once a user applies a theme to a demo that previously used legacy branding, that demo permanently switches to themes. The legacy branding settings are no longer accessible for that demo.
Applying Demo Themes in bulk
To help you transition from legacy branding to Themes, we’re also introducing Themes as a bulk action in the Demo Library tab.
Understanding which demos use Themes
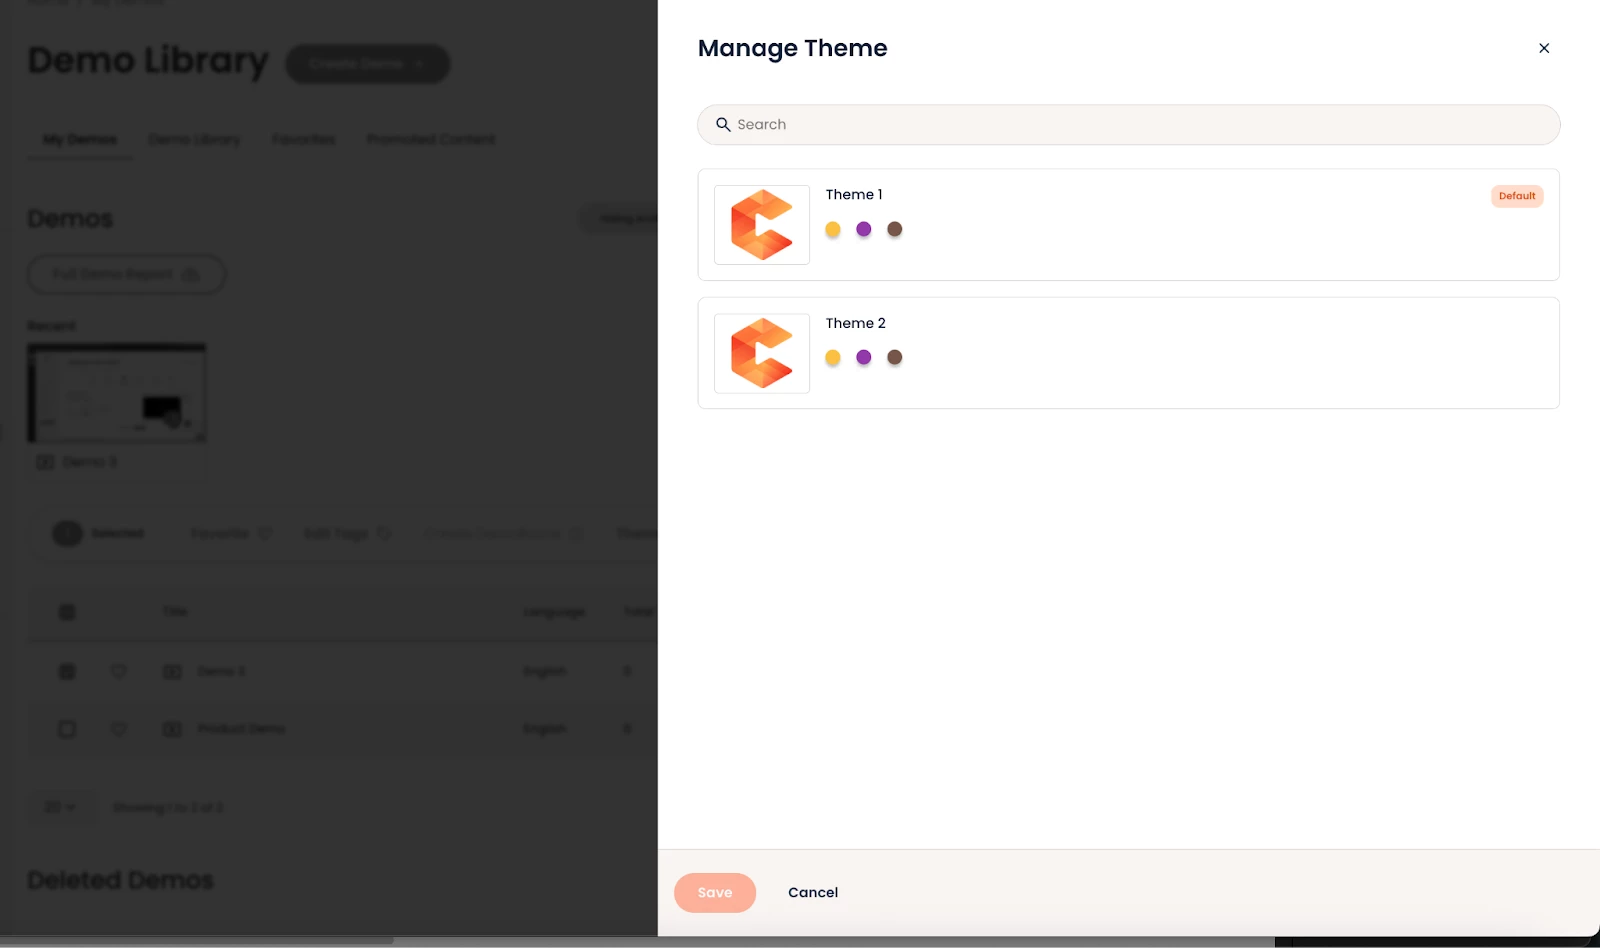
In the Demo Library tab we’ve included an additional column called ‘Theme’. A paintbrush icon will show to every demo that has been branded using Themes instead of the legacy branding styles.
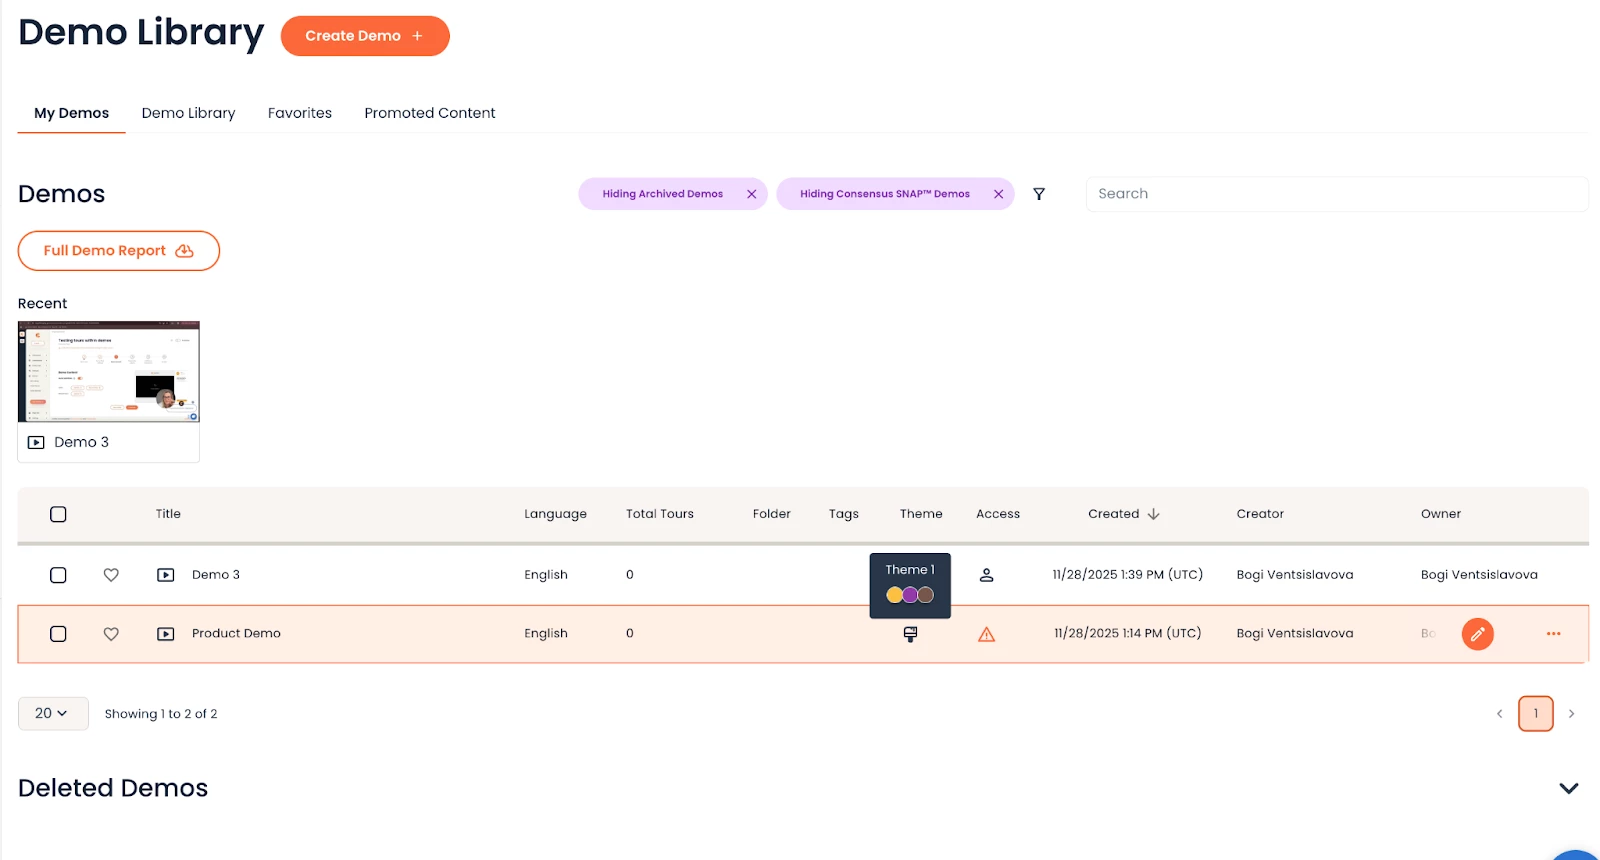
In the screenshot above the only demo that’s branded via Demo Themes is the one called Product Demo.
On hover over the Themes icon, the main colors of the theme display. The Cover Page Color, CTA & button and interactive elements are the main colors for every theme.
Branding demos in mass
To update multiple Single and Standard demos with Demo Themes, select the demos and you’ll find a Themes action in the multi-select action bar:
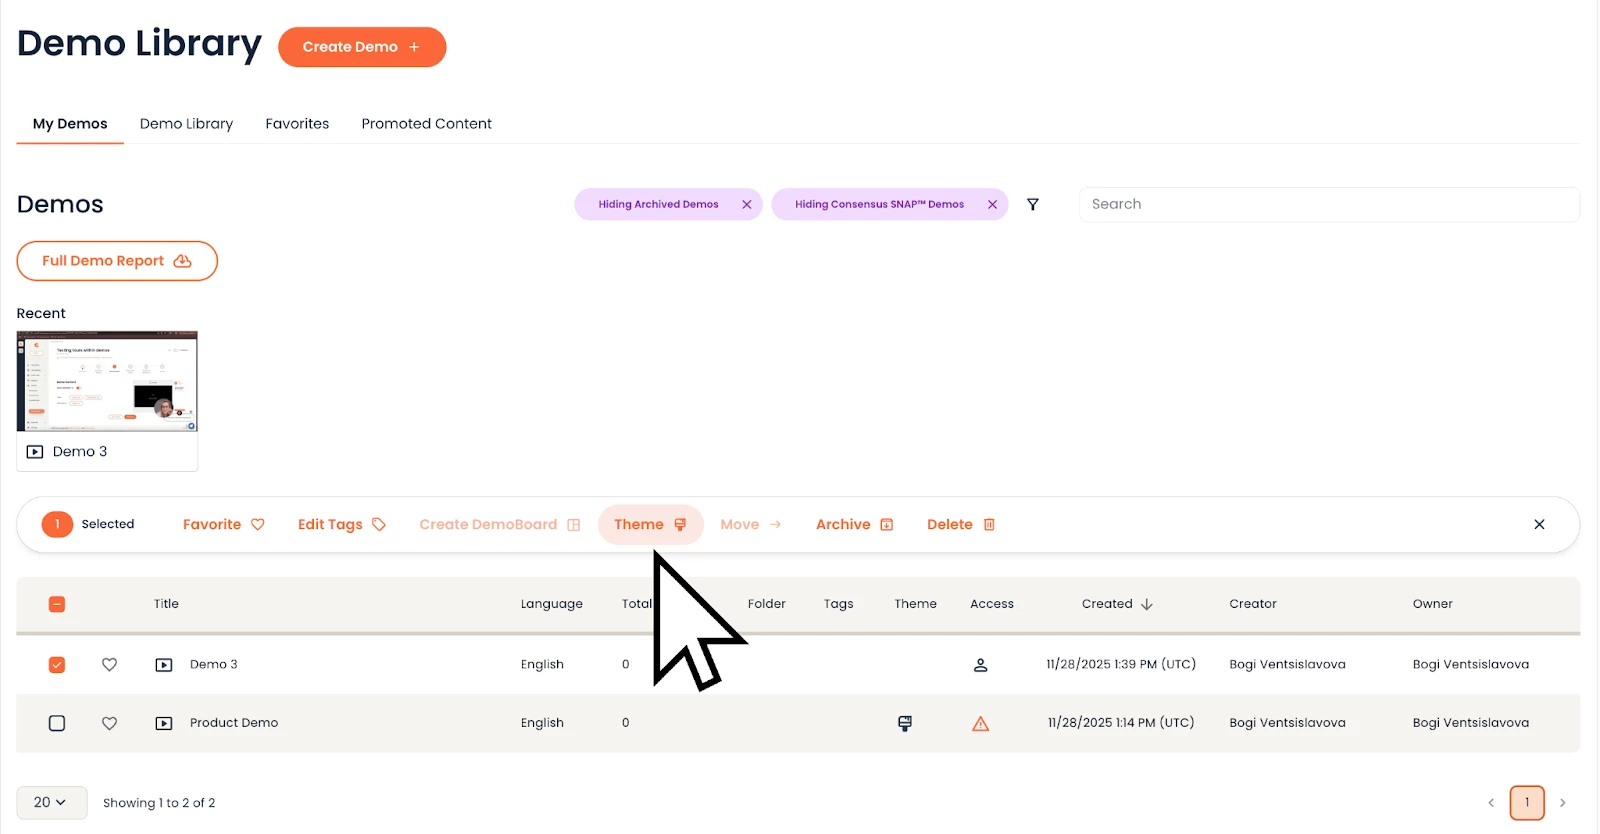
Click on the bulk action to apply your theme, and an additional modal will open where you can select from your active themes.
When users click Save, a confirmation modal appears to confirm the change after which the update is done.
Demo Type Limitations
Demo themes can currently only be applied to Single Experience Demos and Standard Personalization Demos. Discovery Demos built using Single Experience and Standard Personalization Demos will carry over the theme from the original demos. Advance Branching Demos will not support the new Demo Themes capabilities.
Resellers
Resellers manage their own Demo Themes independently from the internal organization, ensuring each group maintains distinct branding for their audiences.
Which reseller roles can manage Themes?
Content Manager resellers and Public Link Manager resellers have Themes management rights, allowing them to create and manage themes for their reseller group.
How Themes work for resellers
Each reseller group sees only their own themes. Internal users see internal themes, and other reseller groups cannot access each other's themes. This isolation keeps branding distinct and prevents confusion across organizations.
Like internal users, resellers should build their own Demo Themes that reflect their brand identity. Resellers access the Theme Builder from Global Demo Settings and follow the same configuration process as internal users.
What happens when Themes are enabled
When the internal Admin enables Demo Themes (by creating at least one active theme and toggling on Demo Themes in Account Settings), this change impacts all reseller groups immediately.
For Resellers Editing Demos:
Once Themes are enabled, the resellers experience is the following:
Scenario 1: Reseller has created Themes
When a reseller has at least one active theme (their Default theme):
- The Themes/Legacy toggle appears when editing demos
- Resellers cannot update legacy branding settings but can apply their own theme from Step 2 of Demo Builder
- Applying a reseller theme replaces legacy branding with the reseller's branded experience
Scenario 2: Reseller has not created Themes yet
When a reseller hasn't created any themes but the internal Admin has enabled Themes:
- Demos continue using existing branding settings until the reseller creates a theme.
Best Practice for Resellers
To ensure a consistent branded experience for your audience, create at least one theme before editing demos. This allows you to immediately start using the new capability instead of granually applying branding settings to the demos shared with you.
Demo Themes in SNAP
Before you can use Demo Themes in Snap, make sure:
- You have at least one Theme created in your Consensus workspace
- Demo Themes are enabled for your organization
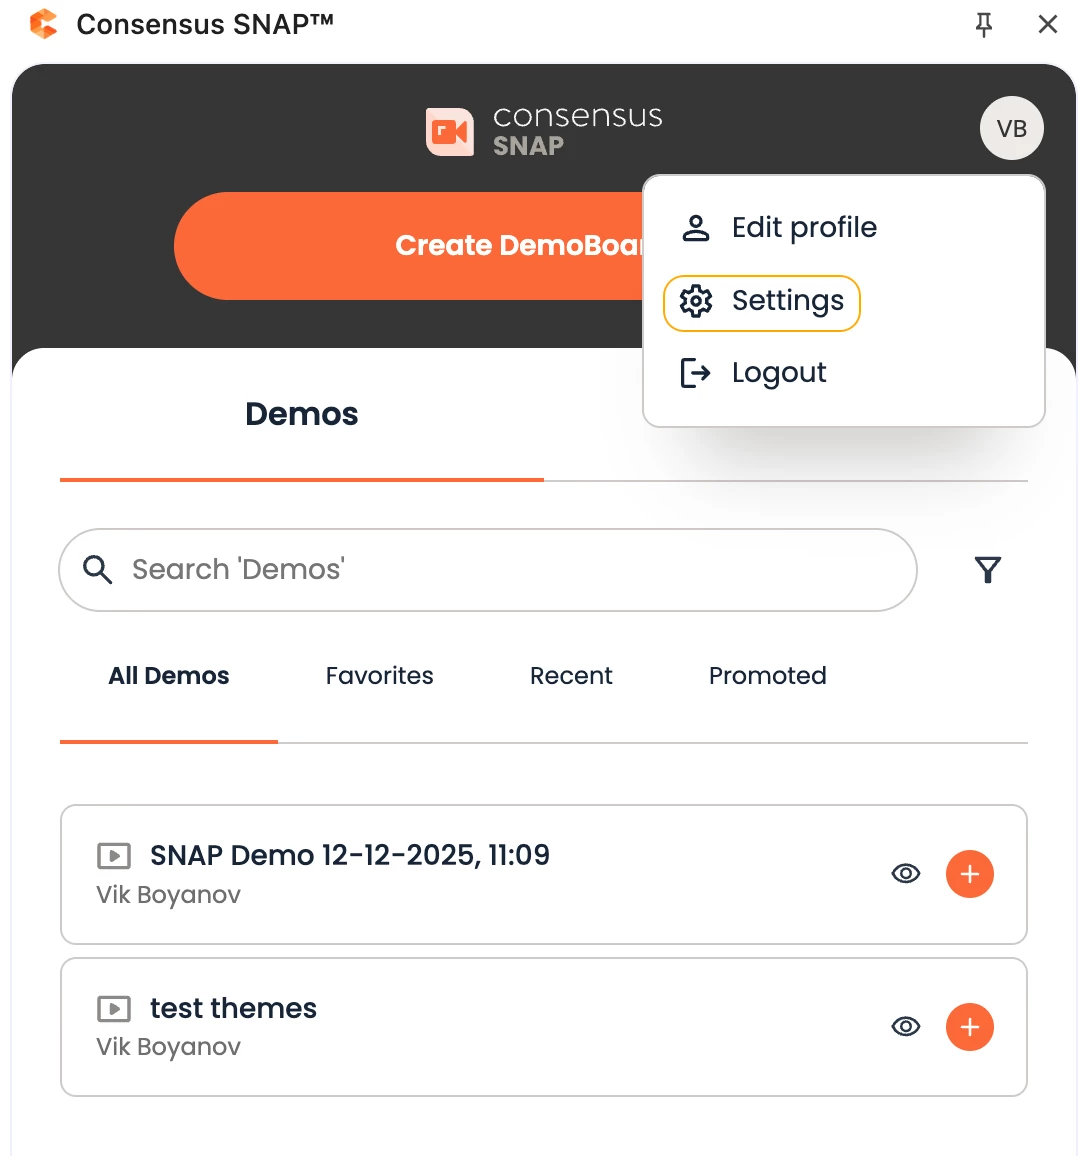
Once these are in place, you can customize the theme for your Snap videos by opening the Snap extension, logging in, and navigating to Settings.
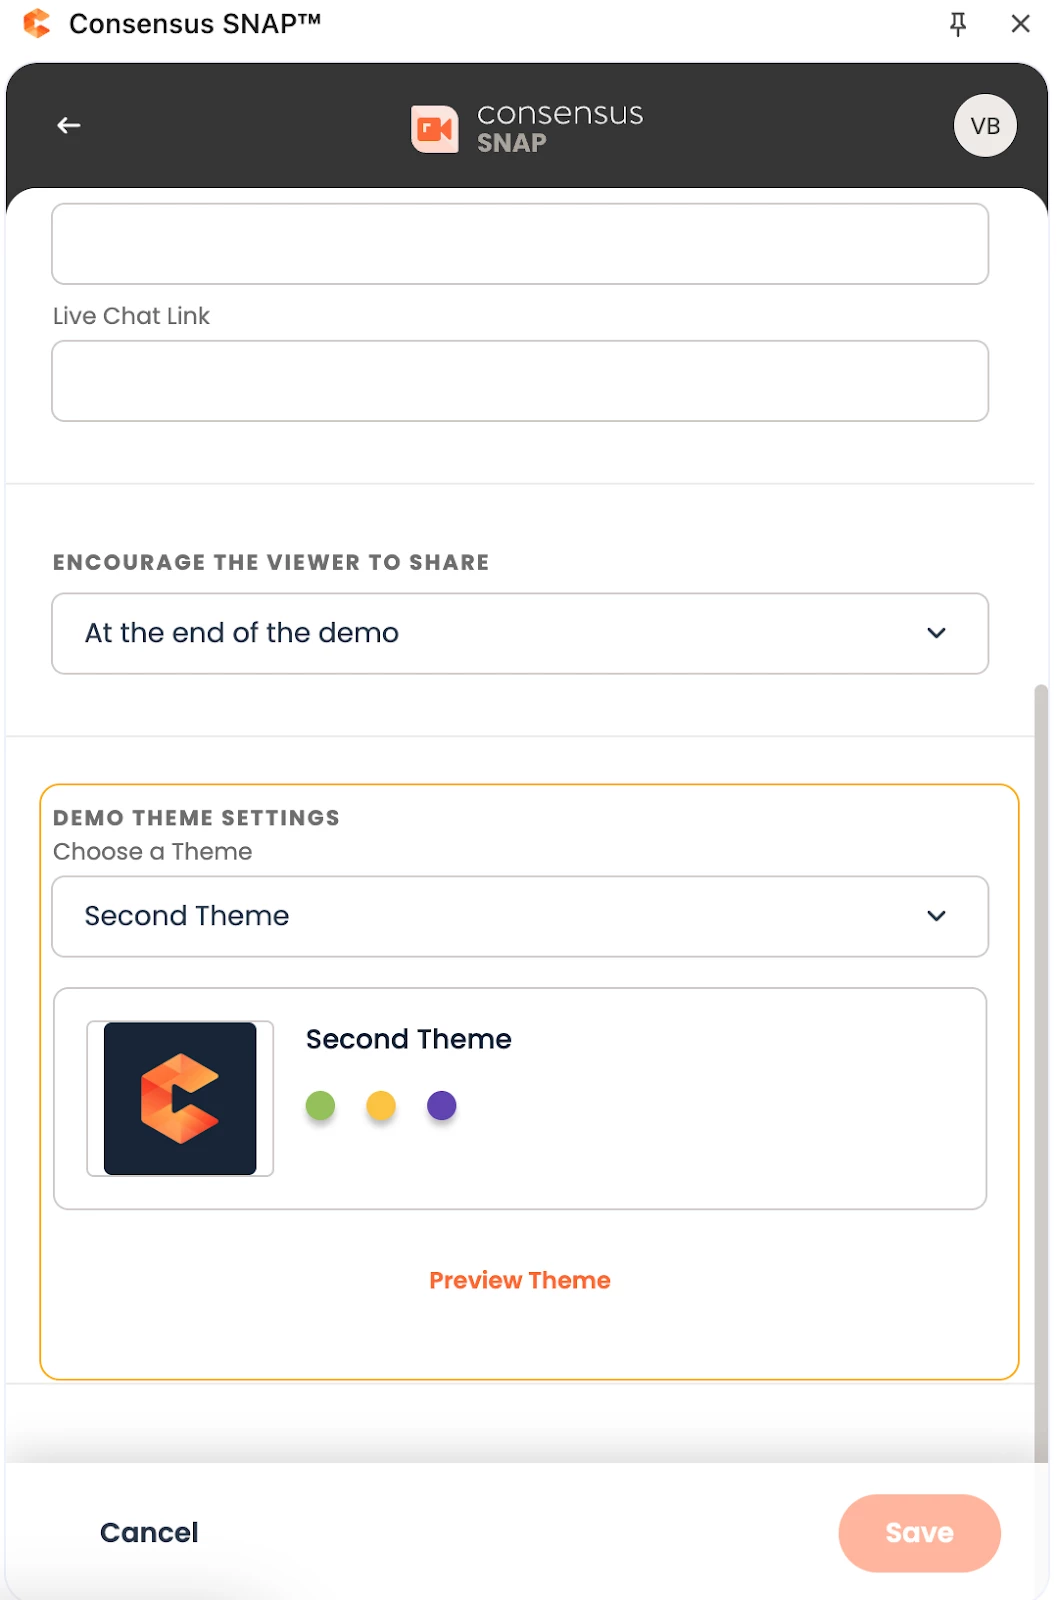
Configuring Your Theme
Scroll down to find the Demo Theme Settings section. Your organization's default theme will be automatically selected, but you can choose a different one from the dropdown if you'd like.
You'll see a quick preview of your selected theme right in the settings. Want to see more details or make changes? Click Preview Theme to open the full theme editor in your Consensus workspace (note: only admins can edit themes).
Important to Know ⚠️
Demo Themes you configure in Snap only apply to videos you create or upload directly through Snap. If you add a demo from your existing Demo Library, it will use whatever theme was set when that demo was originally created in the web app